Mouth Breather Face: What It Is, What Causes It, and Whether It Can Be Corrected

The facial changes associated with chronic mouth breathing are real and clinically documented. Whether they can be modified or only managed depends almost entirely on whether treatment starts during growth or after it. Guidance from Dr. Jacob at Smile City Orthodontics, Sunnyvale, TX.

“Mouth breather face” refers to a pattern of facial and dental development that can result from chronic mouth breathing during childhood, including a long, narrow face, a high-arched palate, an open bite, and crowded teeth. These changes develop gradually because the forces of nasal breathing, tongue posture, and lip seal that normally shape jaw growth are absent. In growing children, airway orthodontics can redirect that development and reduce the severity of these changes. In adults whose growth is complete, treatment focuses on managing the dental and airway effects rather than altering the facial structure itself. Identifying the cause of the mouth breathing is the first step, because the cause determines the treatment.

“Mouth breather face” has become a recognizable term online, but the clinical concept behind it is not new. Orthodontists have documented the relationship between airway obstruction, habitual mouth breathing, and altered facial development for decades. The facial pattern that results is distinct enough that experienced clinicians can often identify chronic childhood mouth breathing from the structure of the face alone.

What the term does not capture is the range of severity, the different causes that can produce similar-looking results, and the meaningful difference between what can be done during growth versus after it. Those distinctions matter for any family trying to decide whether and when to pursue treatment.

Dr. Jacob at Smile City Orthodontics in Sunnyvale has specific training and technology for airway orthodontics, including CBCT 3D imaging that shows the airway itself, not just the teeth. The breakdown below follows the same framework used in that clinical evaluation.

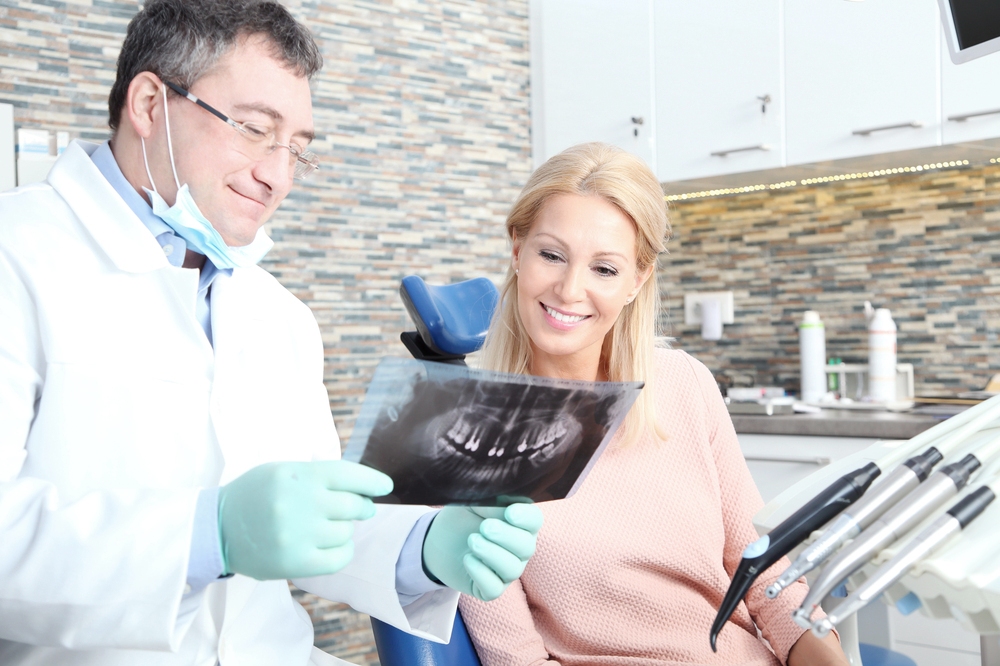
orthodontist showing x ray image to patient - Mouth Breather Face: What It Is, What Causes It, and Whether It Can Be Corrected in Sunnyvale TX

What “Mouth Breather Face” Actually Looks Like

The clinical term most commonly used is “adenoid facies,” though the pattern can develop from any cause of chronic mouth breathing, not just enlarged adenoids. The features that develop tend to cluster together because they all result from the same underlying disruption: the absence of the nasal breathing mechanics and tongue posture that normally guide how the jaws and face grow.

The characteristics most commonly associated with the pattern include:

  • A long, narrow face. The lower third of the face elongates, giving a vertically stretched appearance. The cheekbones appear flatter and the face narrower than would be typical.
  • A narrow upper jaw. Normal tongue posture, with the tongue resting against the roof of the mouth, provides gentle outward pressure that helps the upper jaw develop its proper width. Mouth breathers frequently hold the tongue low in the mouth, removing that pressure. The result is a narrow, V-shaped upper arch rather than a broader, U-shaped one.
  • A high, arched palate. Related to the narrow upper jaw, the roof of the mouth appears high and vaulted rather than flat and wide.
  • An open bite or anterior open bite. The front teeth may not meet when the back teeth close together, partly because the tongue position and swallowing pattern associated with mouth breathing encourages this.
  • Lips that rest apart. The lips do not naturally seal at rest, and the lower lip may appear to strain slightly to close against the upper teeth.
  • A recessed or underdeveloped chin. The lower jaw may appear to sit further back than ideal, partly because of the altered growth direction.
  • Dark circles or puffiness under the eyes. Chronic nasal congestion or obstruction, a common cause of mouth breathing, can cause venous pooling under the eyes that produces dark circles even in children.

Not every chronic mouth breather develops all of these features, and the severity varies widely. Genetics plays a role alongside habit and obstruction. But the pattern is consistent enough that it is clinically recognizable.

The Distinction That Decides the Treatment Path

Two different causes can produce the same mouth-breathing habit, and they point toward different treatments.

Structural or medical obstruction means there is a physical reason the airway is blocked, making nasal breathing difficult or impossible. Enlarged adenoids or tonsils are the most common cause in children. A deviated nasal septum, nasal polyps, severe allergies causing chronic congestion, or a structurally narrow airway passage can all produce the same result: the child breathes through the mouth because the nose does not work well enough. In these cases, the mouth breathing is a secondary effect of an airway problem, and the primary treatment is often medical or surgical. Enlarged adenoids and tonsils in children are addressed by a pediatric ENT. Nasal structural issues may need ENT evaluation as well. Orthodontic treatment addresses the dental and skeletal changes that have already developed and may work to support airway space through expansion.

Habitual mouth breathing occurs when the airway is structurally adequate but the patient has developed a habit of breathing through the mouth, sometimes starting from a period of congestion that then continued as a default pattern. In these cases, the airway itself is not blocked, but the tongue posture, lip seal, and nasal breathing mechanics have not been consistently engaged. Treatment focuses on myofunctional therapy to retrain the breathing pattern, orthodontic management of the dental changes, and monitoring development.

In practice, many patients have a mix of both: some anatomical contribution alongside a habitual component. The CBCT imaging used at Smile City Orthodontics can assess the airway dimensions directly, not just the teeth, which allows Dr. Jacob to quantify the structural picture before making a treatment recommendation.

How Chronic Mouth Breathing Changes Facial Development

Understanding this requires a brief look at what normal jaw development depends on.

The bones of the face and jaws are unusually responsive to soft tissue forces during growth. The upper jaw is not a single rigid structure; it develops under the influence of the tongue pressing upward against the palate, the lips maintaining a seal that provides gentle inward pressure from the front, and nasal airflow passing through and above the palate. This combination of forces from multiple directions is part of what shapes a broad, well-proportioned arch.

When a child breathes chronically through the mouth, several of those forces change. The tongue drops from the palate, removing the lateral expansion pressure. The lips part at rest rather than sealing. The jaw drops slightly and the head often tilts forward and downward to keep the airway open. Over months and years, the jaw grows more in the vertical direction and less in the forward direction. The upper arch narrows. The face elongates.

This is not a rapid or obvious process. It happens slowly, over years of development, which is why parents often do not notice until the changes are already well established. It is also why the window for redirecting development is during childhood growth rather than after.

The Dental Changes That Develop Alongside the Facial Pattern

The dental effects of chronic mouth breathing are closely tied to the skeletal changes but are worth naming separately because they are often the reason families first seek an orthodontic evaluation.

  • Crowding is one of the most common presentations. A narrow upper arch does not provide enough space for all the upper teeth to erupt in alignment, so they crowd, rotate, or become impacted. The crowding is the visible symptom; the narrow arch is the underlying cause.
  • Posterior crossbite develops when the upper arch is so narrow that the upper back teeth sit inside rather than outside the lower back teeth when the jaws close. This is a functional bite problem, not just a cosmetic one, and it creates uneven wear on the teeth over time.
  • Anterior open bite occurs when the front teeth do not make contact when the back teeth are together. The gap can be small or significant, and it affects how effectively the patient can bite into food as well as sometimes affecting speech.
  • A gummy smile can develop when the front teeth over-erupt to compensate for vertical jaw growth, resulting in more gum tissue visible when smiling.
  • Increased overbite is sometimes also present, where the upper front teeth cover an excessive portion of the lower front teeth.

Why Timing Determines What Is Possible

The same facial pattern in a 9-year-old and a 35-year-old requires a fundamentally different conversation.

In a growing child, the jaw bones are still developing and the midpalatal suture is still open. Upper jaw expansion using a palatal expander can widen the arch, improve the airway space through the nasal cavity, and redirect vertical growth forces. Early intervention can meaningfully reduce the severity of the facial and dental changes before they fully develop. It does not reverse changes already established, but it can limit how far they progress and reduce the scope of what needs to be managed later.

In a teenager whose growth is largely complete, some modification is still possible, but the window for redirecting skeletal development has narrowed significantly. Dental corrections (braces or aligners) can address the tooth positions and bite, and surgical expansion (SARPE) can widen the upper jaw even after the suture has fused, but the facial bone structure itself is increasingly fixed.

In an adult whose growth is complete, the facial bone structure is largely set. Treatment focuses on correcting the dental and bite effects: orthodontic treatment for the crowding and bite issues, surgical options where the skeletal discrepancy is significant, and ongoing airway support. The facial appearance can be improved meaningfully in adults through comprehensive treatment, but the fundamental bone structure developed during childhood does not change.

A Guide to Treatment Direction by Age and Presentation

See how age and individual presentation can influence treatment planning.

Patient profileWhat’s driving itTypical treatment direction
Young child (5 to 9), obstruction presentEnlarged adenoids, tonsils, or nasal issueENT evaluation first; expander to support arch and airway width; habit/myofunctional guidance
Young child (5 to 9), habit-based breathingStructural airway adequate; habit establishedMyofunctional therapy; expander if arch is narrow; monitor growth closely
Older child or early teen (10 to 14)Facial pattern developing; some growth remainingPalatal expansion (RPE or MARPE); possible vertical growth control appliance; orthodontic treatment
Teen with completed growthJaw growth largely finished; dental changes establishedOrthodontic treatment for crowding and bite; MARPE or SARPE for arch width if needed
AdultGrowth complete; dental and skeletal effects presentOrthodontic treatment; SARPE for significant maxillary constriction; surgical jaw coordination for severe cases

What Airway Orthodontics at Smile City Involves

Smile City Orthodontics has a specific focus on airway-related cases alongside conventional orthodontic treatment. Dr. Jacob’s clinical training and practice technology are oriented toward assessing and addressing the skeletal airway alongside the teeth.

CBCT 3D Imaging with VATECH. Standard dental X-rays show teeth and bone in two dimensions. CBCT scanning shows the airway passage in three dimensions, allowing Dr. Jacob to measure the actual volume and cross-sectional dimensions of the nasal airway and pharyngeal airway alongside the jaw and tooth anatomy. This is the difference between estimating airway adequacy and actually measuring it.

Palatal expansion options. Smile City offers RPE (Rapid Palatal Expander) for younger growing patients, MARPE (Miniscrew-Assisted Rapid Palatal Expansion) for older teens and adults in whom the suture is beginning to close, and SARPE (Surgically Assisted Rapid Palatal Expansion) for adults who need significant upper jaw widening after growth. Each is matched to the patient’s skeletal maturity and the degree of expansion needed.

Vertical growth control. For growing patients with excessive vertical facial development, vertical pull chin-cups and other growth-modifying appliances can help redirect jaw growth in a more forward direction rather than purely downward.

Coordination with ENT and other specialists. When obstructive causes are present, Dr. Jacob coordinates with ear, nose, and throat specialists as appropriate, since orthodontic treatment alone cannot resolve structural airway obstruction. The dental and orthodontic changes are addressed alongside, not instead of, the medical causes.

Braces and Invisalign for dental correction. Once the skeletal issues are addressed, braces or Invisalign correct the resulting crowding, crossbite, open bite, or other dental effects of the mouth-breathing pattern.

What Only a Consultation and CBCT Imaging Can Confirm

The facial changes associated with chronic mouth breathing are visible, but the cause and the degree of the structural airway involvement are not. Two children with similar facial patterns can have very different clinical pictures once the airway is actually measured.

Whether the obstruction is primarily adenoid or tonsil-related, what the three-dimensional airway dimensions look like, how much growth remains, and which specific interventions are indicated for a specific patient all require clinical records to answer. General information about mouth breather face explains the pattern; the consultation is where that pattern is connected to this patient’s specific anatomy and history.

How Smile City Orthodontics Evaluates and Treats Mouth-Breathing Cases

The first step at Smile City Orthodontics is imaging that includes the airway, not just the teeth. Dr. Jacob uses CBCT scanning to assess the nasal and pharyngeal airway dimensions, the palatal width and arch form, the skeletal maturity, and the facial growth direction, all in a single scan. Digital records allow precise comparison across visits to track whether the airway is improving as treatment progresses.

For growing patients with a narrow arch and an airway component, an expander is typically the first active appliance, with braces or other treatment following once the arch is widened and the airway situation is addressed or under management. For older patients whose growth has slowed or stopped, MARPE is a minimally invasive option that can achieve arch widening without surgery for many cases. For patients where the dental effects are the primary focus and the skeletal picture is manageable orthodontically, braces or Invisalign are planned with the mouth-breathing history in mind.

All costs and treatment options are reviewed at the free consultation, with insurance and financing details confirmed before any treatment starts. Smile City Orthodontics accepts Delta Dental, Blue Cross Blue Shield, Aetna, Guardian, MetLife, United Healthcare, G.E.H.A, Careington, and Ameritas, and offers flexible 0% APR payment plans.

Serving Sunnyvale and Surrounding Communities

Smile City Orthodontics is located at 180 S Collins Rd, Suite 200, in Sunnyvale, TX 75182, just off Highway 80 and approximately 20 minutes from Downtown Dallas. The practice evaluates and treats mouth-breathing and airway cases for patients from Sunnyvale, Mesquite, Garland, Rowlett, Rockwall, Wylie, and Murphy.

Early evaluation is particularly important for airway cases. The American Association of Orthodontists recommends a first orthodontic evaluation by age 7, and airway concerns are among the most important reasons to keep that timeline rather than waiting until all the adult teeth are in.

Common Questions About Mouth Breather Face

Is mouth breather face permanent in children?

In a growing child, it is not fully established yet, which is why early intervention can still redirect development. The changes already present may or may not be fully reversible, but early treatment can prevent the pattern from reaching its worst expression and reduce the scope of what needs to be managed later. The younger the child when treatment starts, the more growth remains to work with.

What causes a child to breathe through the mouth?

The most common cause in children is obstruction, typically enlarged adenoids or tonsils that partially or fully block the nasal passage, making nasal breathing labored or uncomfortable. Chronic allergies causing nasal congestion, a narrow airway, or a deviated nasal septum can also contribute. Some children develop a habitual mouth-breathing pattern after a period of congestion even after the congestion resolves. The cause matters because obstructive causes require medical treatment alongside orthodontic treatment.

Can adults reverse mouth breather face changes?

Fully reversing established facial bone structure is not possible without surgical intervention. However, adults can see meaningful improvement through comprehensive treatment: palatal expansion with SARPE or MARPE can widen the upper jaw and improve the airway, orthodontic treatment corrects the dental effects (crowding, bite), and jaw surgery can address more significant skeletal discrepancies for appropriate candidates. The result is an improved bite, improved airway function, and an improved smile, even if the fundamental bone architecture developed in childhood does not change.

How does an orthodontist treat mouth breathing differently from a regular dentist?

A general dentist can identify the dental signs of mouth breathing and refer appropriately, but the management of the skeletal, airway, and growth-redirection components requires orthodontic training and the imaging technology to assess the airway directly. CBCT imaging, palatal expansion planning, MARPE and SARPE protocols, and growth-modification appliances are within the scope of orthodontic treatment. An orthodontist with specific airway training and appropriate technology is the right starting point for families concerned about mouth breather face in a child.

At what age should I bring my child in if I suspect mouth breathing is affecting their development?

As early as the concern arises, and definitely by age 7. The value of early evaluation is that it allows the orthodontist to determine whether intervention is indicated now, whether monitoring is the right approach for the moment, or whether an ENT referral should come first. Waiting until all the adult teeth have erupted, the traditional timing for starting braces, means potentially missing several years of the growth window during which the most effective skeletal modifications can be made.

young group of orthodontist looking at x ray - Mouth Breather Face: What It Is, What Causes It, and Whether It Can Be Corrected in Sunnyvale TX

Schedule a Free Airway and Bite Evaluation in Sunnyvale

Smile City Orthodontics uses CBCT 3D imaging to evaluate both the teeth and the airway at a free consultation. Dr. Jacob assesses whether mouth breathing is affecting your child’s development and what treatment options are appropriate for their age and clinical picture.

Schedule Your Free Consultation

How Long Does Invisalign Take? What the Timeline Really Depends On

Case complexity sets the floor. Daily wear time determines whether you hit it or exceed it. A straightforward guide from Dr. Jacob at Smile City Orthodontics, Sunnyvale, TX.

How long does Invisalign take? Mild Invisalign cases can finish in 6 to 12 months. Moderate cases typically run 12 to 18 months. More comprehensive cases involving bite correction or significant movement often take 18 to 24 months or longer. The most important thing a patient controls is daily wear time. Invisalign only works while the trays are in the mouth. Patients who consistently wear their aligners 20 to 22 hours a day tend to finish close to their original estimate. Patients who fall short regularly extend their treatment, sometimes by several months.

Every Invisalign patient asks some version of the same question: “How long is this going to take?” The truthful answer has two parts. How complex your case is determines the minimum realistic timeline. How consistently you wear your trays determines whether you hit that minimum or overshoot it.

At Smile City Orthodontics in Sunnyvale, Dr. Jacob uses CBCT 3D imaging and digital scanning with iTero and MEDIT to map out the full treatment plan before the first tray is made. That means patients know their expected timeline and see a digital preview of their result before they commit to anything.

The breakdown below follows the same logic used in that planning conversation: what actually drives the timeline, what the ranges look like by case type, and what the compliance math adds up to over the course of treatment.

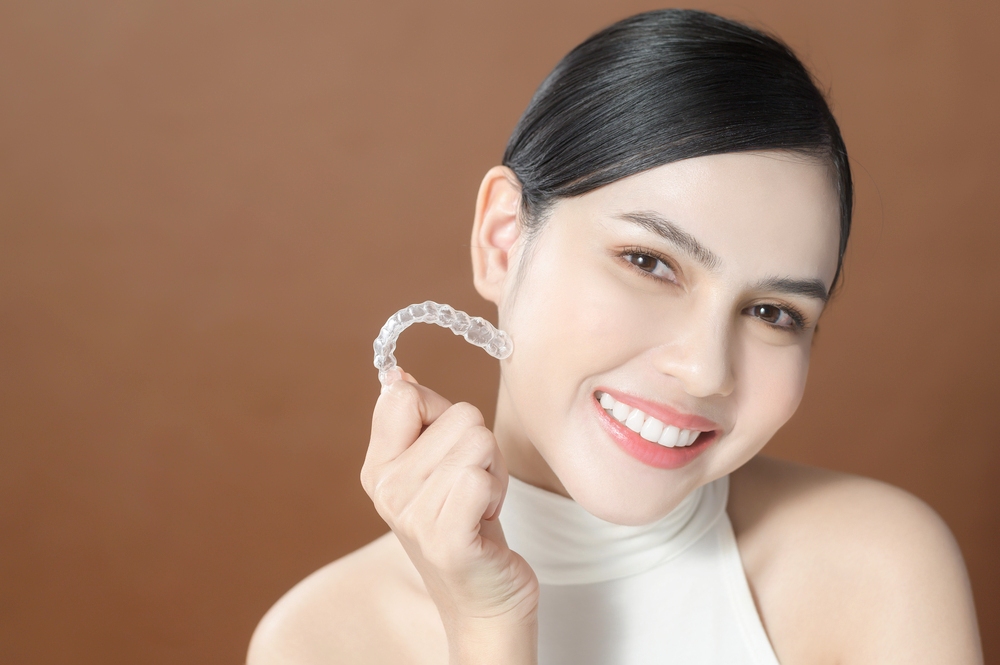
a woman pointing her teeth holding clear aligners - How Long Does Invisalign Take? What the Timeline Really Depends On, Sunnyvale TX

Why Invisalign Timelines Vary So Much

The range quoted for Invisalign, 6 months to 24 months or more, is wide because it covers genuinely different clinical situations. A patient correcting minor crowding left over from a previous orthodontic relapse has a fundamentally different starting point from a patient addressing a deep overbite with significant crowding on both arches.

What those two patients have in common is that Invisalign moves teeth the same way: a staged series of custom-made clear trays, each one slightly different from the last, each one applying controlled pressure to nudge specific teeth incrementally toward their planned positions. The biological process that allows those teeth to move — bone remodeling around the roots — cannot be rushed beyond a certain rate. That rate is similar across healthy adults regardless of which aligner brand is used.

The clinical complexity of the case determines how many stages that process requires. The patient’s daily wear habits determine how reliably each stage is completed before the next tray begins.

The Two Variables That Determine Your Timeline

These two variables operate independently but stack on top of each other.

Case complexity is set at diagnosis, before treatment starts. It reflects how far each tooth needs to travel, what bite corrections need to be incorporated, and how many teeth are involved. A mild crowding case needs fewer trays and less total movement. A comprehensive case with a bite component needs more of both. This variable is largely fixed once the clinical picture is assessed — it is not something a patient can change, but it is something Dr. Jacob can quantify clearly at the consultation.

Daily wear time is set by the patient, every single day throughout treatment. Aligners only move teeth while they are in the mouth, which means hours spent with trays out are hours where no progress is being made. The force that moves teeth is not stored up and released later; it is applied continuously or not at all. Patients who consistently hit 20 to 22 hours a day move through their tray sequence on schedule. Patients who average 14 to 16 hours regularly fall behind, and the gap adds up over months of treatment.

The interplay matters: a complex case worn faithfully will usually finish closer to the optimistic end of the range. A simple case worn inconsistently can take as long as a moderate one handled well.

What Typical Timelines Look Like by Case Type

These ranges assume consistent daily wear. Each category reflects the general scope of tooth movement involved, not a formal clinical classification.

Minor alignment and touch-up cases involve small amounts of crowding or spacing, often relapse from previous orthodontic treatment where teeth have gradually shifted. These cases typically require fewer than 14 to 20 trays and finish in the 6 to 12 month range. They are the best candidates for short-course aligner programs when the orthodontist confirms a genuinely limited scope.

Mild to moderate alignment cases cover more meaningful crowding or spacing, typically up to around 6mm of total discrepancy across one or both arches, without significant bite correction. These cases run approximately 12 to 18 months for most patients.

Moderate to comprehensive cases add a bite correction component alongside the alignment, or involve more demanding tooth movements such as significant rotation, space closure after extractions, or a larger overall arch discrepancy. These cases more commonly run 18 to 24 months, and cases at the more complex end can extend beyond that range.

Phase I aligner cases for younger patients are a separate category. Treatment length varies by what is being intercepted and how much growth the patient still has available.

The Four Factors That Move Your Number Up or Down

Here are the four key factors that can affect your orthodontic treatment costs.

How Much Total Tooth Movement the Plan Requires

This is the most straightforward driver. A tooth that needs to move 1mm requires fewer aligner stages than a tooth that needs to move 5mm. Multiply that across a full arch and the difference compounds quickly. Cases with multiple teeth requiring larger movements simply need more trays, and more trays means more time regardless of how well the patient complies.

Whether Bite Correction Is Involved

Cases that involve correcting how the upper and lower teeth meet, such as an overbite, underbite, or crossbite, typically require elastics worn between the upper and lower trays. Bite correction takes longer than alignment alone because it involves establishing a new jaw relationship, not just repositioning individual teeth. Cases with a meaningful bite component consistently run longer than cases where the bite is already reasonably aligned and only the tooth positions need adjustment.

How Much Rotation Is Needed

Rotating a tooth around its long axis is one of the more demanding movements for clear aligners. Unlike forward-backward or up-down tooth movement, rotation requires the aligner to grip and torque the tooth simultaneously. Attachments, small tooth-colored bumps bonded to specific teeth, improve the aligner’s ability to do this, but significant rotations still tend to require more stages and more refinement trays than other movement types.

How Consistently the Trays Are Worn

This is the only variable the patient controls day to day, and it has a larger practical effect on the final timeline than most patients expect. The planned treatment assumes roughly 20 to 22 hours of daily wear. If a patient averages 18 hours a day over a 12-month treatment, the total wear deficit across the treatment period is significant. The result is usually one or more refinement rounds at the end to complete movements that the original tray series could not finish.

A Guide to Invisalign Timeline by Case Profile

Get a closer look at how treatment time can vary from case to case.

Case profileWhat’s driving itTypical range
Minor crowding or relapse correctionTooth position only; small movement per tooth6 to 12 months
Mild crowding or spacing, no bite issueStraightforward alignment, one or both arches12 to 18 months
Moderate crowding with mild bite correctionAlignment plus some bite work; elastics often needed16 to 22 months
Comprehensive alignment with overbite or underbite correctionSignificant tooth movement plus bite correction; elastics required18 to 24+ months
Phase I aligner therapy (growing patients)Interceptive correction; scope depends on what is being addressedVaries; typically 6 to 18 months

All ranges above assume consistent wear near the 20 to 22 hour daily target. Cases with consistently lower wear time can add 3 to 6 months or more to any of these estimates.

The Daily Wear Math and Why It Matters

Twenty to twenty-two hours a day sounds specific, but what it really means is: trays out only for eating, drinking anything other than water, and brushing and flossing. That is typically two to three hours total across a full day, including meals. Everything else — sleeping, talking, working, exercising — happens with the trays in.

The reason is biological. The force that moves a tooth comes from the constant pressure the aligner applies against it. When the tray is removed, that pressure stops, and the tooth and surrounding ligament partially rebound toward their previous position. Putting the tray back in does not simply resume from where it left off; it has to re-establish the pressure cycle. Hours out of the mouth do not accumulate as neutral time — they partially undo the progress made while the tray was in.

Over the course of a 12 to 18 month treatment, the difference between averaging 21 hours a day and averaging 17 hours a day is not trivial. It can represent several additional tray sets, a refinement round that would not otherwise have been needed, and two to four added months of total treatment.

The most common hours lost are during meals that run longer than expected, social events where patients remove the trays and forget to put them back in, or a habit of leaving them out during work or school because they feel inconvenient. Building a simple daily habit — a phone reminder, a tray case always within reach, putting them back in immediately after eating — is what bridges the gap between the planned and actual wear time.

Refinement Rounds: What They Mean for Your Timeline

A refinement is a supplemental set of aligners made after the original series finishes, based on a new digital scan showing how the teeth actually moved versus how the plan intended them to move.

Refinements are common and expected rather than a sign that something went wrong. Most Invisalign cases involve at least one refinement round before the final result is achieved, because tooth movement is a biological process that rarely tracks the digital plan exactly across many months of treatment. Teeth can lag behind the planned rate, particularly in more demanding movements, and the refinement round is how those movements get completed.

A refinement typically adds two to six months to the total timeline depending on how much additional movement is needed. When refinements are needed, Dr. Jacob takes a new digital scan, submits it to Invisalign’s ClinCheck planning software, and a new set of trays is manufactured. The patient continues wearing trays through the refinement period exactly as before.

At Smile City Orthodontics, refinement needs are monitored at every check-in visit using digital scanning, so if the teeth are falling behind the planned movements the conversation about a refinement happens early rather than after the original series has fully finished.

What Only a Consultation and Imaging Can Determine

The ranges in this guide are useful context, but they cannot tell any specific patient how long their treatment will take. That answer requires the clinical picture.

At a consultation at Smile City Orthodontics, Dr. Jacob uses CBCT 3D imaging with VATECH technology and digital scanning with iTero and MEDIT to assess the actual tooth positions, bite relationship, root angles, and any jaw component. From that imaging, a full ClinCheck treatment plan is built before the first tray is manufactured, which means patients see the planned outcome and a tray-by-tray movement sequence before committing to treatment.

That process is also where the honest case complexity conversation happens. If a case requires a comprehensive plan running 20 to 24 months, Dr. Jacob says so clearly rather than presenting a shorter estimate that will require multiple revisions. And if a case is genuinely mild and can be completed in 9 to 12 months, that is what the plan reflects.

How Smile City Orthodontics Manages Your Invisalign Treatment

Every Invisalign case at Smile City Orthodontics follows the same process from start to retention.

Consultation and 3D imaging. The free consultation includes a full bite evaluation, CBCT imaging, and digital scanning. The ClinCheck plan and a 3D preview of the expected outcome are reviewed with the patient before treatment starts.

Tray delivery and wear guidance. Once the aligners arrive, Dr. Jacob reviews the wear schedule, tray switching frequency (typically every 7 to 14 days depending on case design), and how to manage the first days in each new tray. Attachments are placed if the plan requires them for specific tooth movements.

Regular check-in appointments. Patients are seen every 6 to 10 weeks to assess tracking, review tray progress, and confirm the teeth are moving on plan. Digital scanning at each visit gives Dr. Jacob the detail needed to catch any tracking issue early rather than discovering it at the end of the original series.

Refinements managed as part of treatment. If the case needs a refinement round, the scan, submission, and new tray delivery are handled as part of the ongoing treatment relationship, not as a separate add-on.

Retention. Once Invisalign is complete, retainers are fitted to hold the result. Smile City Orthodontics offers Vivera, Hawley, and fixed retainer options. Dr. Jacob recommends the type that fits the specific case and the patient’s lifestyle, and gives clear guidance on the wear schedule.

Insurance plans accepted at Smile City Orthodontics include Delta Dental, Blue Cross Blue Shield, Aetna, Guardian, MetLife, United Healthcare, G.E.H.A, Careington, and Ameritas. Flexible payment plans with 0% APR financing are available, and all costs are reviewed at the consultation before treatment begins.

Invisalign Near Sunnyvale and the Surrounding Area

Smile City Orthodontics is located at 180 S Collins Rd, Suite 200, in Sunnyvale, TX, just off Highway 80 and about 20 minutes from Downtown Dallas. The practice sees Invisalign patients from Sunnyvale and the surrounding communities of Mesquite, Garland, Rowlett, Rockwall, Wylie, and Murphy.

The Invisalign process and timeline ranges described in this guide apply the same way regardless of where the patient lives. What changes from case to case is the clinical starting point and the daily wear habits the patient brings to treatment — both of which are things the consultation is designed to assess and plan around.

Common Questions About How Long Invisalign Takes

Can Invisalign really work in 6 months?

For genuinely minor cases, yes. A patient correcting mild relapse from previous orthodontic treatment, or closing a small gap with no bite component, may legitimately finish in 6 to 9 months. However, cases that present as minor from the outside sometimes turn out to involve more movement than expected once the 3D imaging is reviewed. The consultation with imaging is what confirms whether a short-course treatment is actually appropriate for a specific case, rather than being an optimistic estimate that leads to an extension later.

What happens if I do not wear my aligners enough hours per day?

The trays do not move the teeth to the planned position, so the next tray in the series fits poorly and the movement staggers. Over time this leads to the treatment falling behind schedule, which typically results in a refinement round at the end of the original series to complete the movements that did not finish as planned. The refinement adds trays and adds months. There is no way to make up for missed wear time by wearing the next tray longer — each tray is designed to produce a specific movement and then give way to the next one.

Is Invisalign faster than braces?

For mild to moderate alignment cases, the timelines are often similar, with Invisalign sometimes finishing slightly faster for well-suited cases with disciplined wear. For more complex cases involving significant bite correction or demanding rotations, braces tend to be more time-efficient because the fixed appliance applies force continuously without a compliance variable and gives the orthodontist more direct control over certain movements. The Invisalign vs braces page covers the full comparison for patients weighing both options.

How often do I need to come in during Invisalign treatment?

At Smile City Orthodontics, most Invisalign patients are seen every 6 to 10 weeks for a progress check, which involves reviewing how well the teeth are tracking the plan and confirming whether the current tray series is on schedule. These visits are shorter than braces adjustment appointments since there is no wire to adjust, but they are not optional — tracking issues caught early are straightforward to address; tracking issues discovered after the original series is finished require a full refinement round. Digital scanning at each visit gives Dr. Jacob detailed tracking data rather than a visual estimate.

Does Invisalign hurt?

Each new tray applies pressure to teeth that have not yet reached the position that tray is designed to create. Most patients notice a sensation of tightness or mild soreness for one to two days after switching to a new tray, which is a normal sign that the aligner is working. The pressure fades as the teeth move into position and the tray fits more loosely by the end of the wear period. It is generally milder than the soreness of traditional braces adjustments, and most patients manage it without any pain relief. A few patients experience more sensitivity; this is individual and can be discussed with Dr. Jacob if it is a concern.

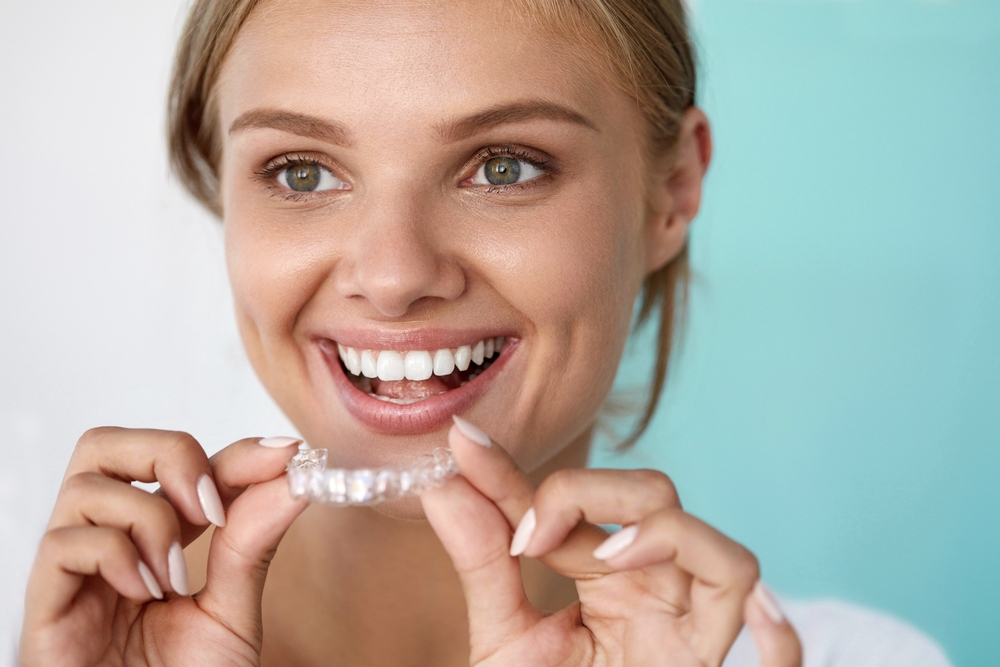
smiling woman with beautiful smile using invisalign clear aligners - How Long Does Invisalign Take? What the Timeline Really Depends On, Sunnyvale, TX

Get a Case-Specific Invisalign Timeline at Your Free Consultation

Smile City Orthodontics uses CBCT 3D imaging and digital scanning to build a full ClinCheck treatment plan before your first tray is made. Dr. Jacob reviews your expected timeline and a 3D preview of your outcome at your free consultation — no commitment required.

Schedule Your Free Consultation

How Long Does It Take To Get Used To Braces? A Week-by-Week Breakdown

The adjustment timeline varies by what you are adjusting to. Physical soreness, speech changes, eating habits, and the cleaning routine each follow their own schedule. Guidance from Dr. Jacob at Smile City Orthodontics, Sunnyvale, TX.

How long does it take to get used to braces? Most patients feel noticeably more comfortable within one to two weeks of getting braces. The initial soreness typically peaks around days two and three, then gradually subsides over the following week. Speech and eating adjustments usually follow a similar timeline. The cleaning routine takes the longest to feel natural, often three to four weeks before the tools and technique become second nature. After each adjustment appointment, a shorter version of the initial soreness tends to return for one to three days.

The most common question in the days after getting braces is some version of: “Is this normal?” Almost always, the answer is yes. The soreness, the pressure, the unfamiliar feeling against the inside of the lips, all of it is a predictable response to a new fixed appliance and resolves on a schedule that is fairly consistent across patients.

At Smile City Orthodontics in Sunnyvale, Dr. Jacob walks every patient through what to expect during the adjustment period at the bonding appointment, because knowing what is normal makes the first week significantly easier to get through.

The breakdown below follows the same timeline: what happens in the first days, when most of the adjustment is complete, what triggers a setback, and how the experience differs across braces types.

young black woman smiling with metal braces - How Long Does It Take To Get Used To Braces? A Week-by-Week Breakdown in Sunnyvale TX

What “Getting Used to Braces” Actually Covers

Patients often talk about the adjustment period as a single thing, but there are really four distinct adjustments happening on overlapping timelines. Each one resolves at a different pace, which is why some patients feel mostly fine after a week while still struggling with flossing two weeks later.

Physical soreness is the most talked-about part and the most temporary. It comes from the pressure the archwire applies to teeth that are being moved for the first time.

Oral sensitivity — the way the brackets, wires, and bands feel against the inside of the cheeks, lips, and tongue – is separate from soreness and resolves through gradual adaptation of the soft tissue.

Functional adjustments cover how braces affect eating and speaking. Both are disrupted early and return to normal quickly for most patients.

Habit adjustments — the new brushing, flossing, and food-choice routines that braces require – take the longest to internalize because they represent genuinely new behaviors rather than physical adaptation.

Understanding which adjustment you are in makes it much easier to know whether what you are feeling is on track or worth mentioning to the orthodontist.

The Core Distinction: Physical Adaptation vs Habit Building

This matters because the two types of adjustment respond to very different things.

Physical adaptation happens passively. The teeth, soft tissue, and jaw muscles adjust to the presence of the appliance whether the patient actively does anything or not. Eating soft foods helps, orthodontic wax helps, and over-the-counter pain relief helps manage the discomfort in the meantime — but the body is doing the work regardless. Most of the physical adjustment is complete within one to two weeks.

Habit building requires deliberate repetition. Learning to use a floss threader, remembering to brush after meals, avoiding the foods that get stuck in brackets — none of this happens automatically. It requires conscious effort for several weeks before it becomes routine. Patients who expect the habit side of the adjustment to feel natural immediately are usually the ones who find the early weeks most frustrating.

The practical takeaway is that getting through the physical adjustment period requires mostly patience, while getting through the habit adjustment requires mostly intentionality.

Days 1 to 3: What to Expect Right After Bonding

The appointment itself is not painful. Brackets are bonded to clean, dry teeth using a bonding resin, and an archwire is threaded through. The process takes one to two hours and involves no drilling, injections, or procedures that break tissue.

What follows in the next few hours is a different story. As the archwire begins applying pressure, the teeth start to feel it. By the end of the first day, most patients notice a dull ache across the front teeth. This is the bone and periodontal ligament beginning to respond to the new force, which is exactly what is supposed to happen.

The inside of the cheeks and lips may also feel raw where the new brackets make contact. This is not injury; it is the soft tissue encountering a new surface it has not built up tolerance against yet.

What helps:

  • Soft foods for the first several days: yogurt, smoothies, mashed potatoes, scrambled eggs, soups, pasta. Nothing that requires heavy chewing or biting with the front teeth.
  • Over-the-counter pain relievers (ibuprofen or acetaminophen, per the packet instructions) taken before the soreness peaks manage most discomfort effectively.
  • Orthodontic wax pressed onto any bracket or wire that is irritating the cheek or lip provides immediate relief for soft tissue soreness. Dr. Jacob provides wax at the bonding appointment.
  • Rinsing with warm salt water soothes irritated tissue and is safe to use as often as needed.

Days 4 to 7: The Soreness Peaks, Then Begins to Ease

For most patients, the second and third day are the worst. The pressure from the archwire has built up to its full initial level, and the soft tissue irritation from the brackets is at its highest before the cheek and lip tissue has adapted.

By day four or five, most patients notice improvement. The teeth are still tender to bite pressure — this is normal — but the constant background ache begins to fade. Chewing becomes less uncomfortable as the days progress.

The soft tissue usually takes a few extra days beyond the tooth soreness. The inside of the cheeks develops a small amount of callus over the contact points with the brackets, which is what makes brackets feel like a normal part of the mouth rather than a foreign object by the end of the first week or into the second.

Continuing with softer foods through the end of the first week is still worthwhile even as the soreness improves. Brackets and archwires are strong, but the bonding is most secure once the resin has fully settled over the first few days.

Weeks 2 to 4: The Adjustment Becomes Normal

By the start of the second week, the majority of patients report that the braces have stopped feeling like a constant presence. The brackets and wires are still there, but they no longer register as discomfort in the background.

Most patients have returned to a fairly normal diet by the end of week two, with the exception of the specific foods that should be avoided throughout treatment (sticky, hard, or chewy items). Chewing with the back teeth is comfortable; biting with the front teeth into hard foods is still best avoided.

Speech changes, if present, typically resolve during this window. The tongue adjusts its positioning around the brackets and wires, and sounds that felt unfamiliar in the first week — often “s” and “t” sounds — return to normal. Some patients never notice a speech change at all; others find it takes closer to three or four weeks. Reading aloud or talking regularly speeds the adjustment.

The cleaning routine is still being established during weeks two and four for most patients. The tools are familiar by this point, but the specific technique — angling the brush correctly, threading floss under the wire — is still requiring conscious thought rather than being automatic. This is normal and continues to become easier with repetition.

Adjustment Timeline at a Glance

Here’s what to expect at each stage of your orthodontic adjustment journey.

What you’re adjusting toTypical timelineWhat helps
Initial tooth sorenessPeaks days 2 to 3; mostly resolved by day 7Soft diet, OTC pain relief, warm salt water rinse
Bracket irritation on cheeks and lipsBegins improving by day 4 to 5; resolved by day 10 to 14Orthodontic wax on specific brackets, soft food diet
Eating normally againBack to most foods by week 2; restricted foods remain off-limits throughoutStarting with soft foods; reintroducing chewier textures gradually
Speech changesResolved for most patients within 1 to 3 weeksReading aloud, normal daily conversation
Cleaning routine feeling natural3 to 4 weeks before technique feels automaticDaily repetition; correct tools from the start
Post-adjustment visit soreness1 to 3 days after each visit throughout treatmentSame management as the first week, shorter duration

What Makes Some Patients Adjust Faster or Slower

Age plays a modest role. Younger patients tend to adapt physically faster because their tissues are more resilient and their bone responds more readily to the new pressure. Adults generally have a very comparable adjustment, though some report the initial soft tissue irritation lasting slightly longer.

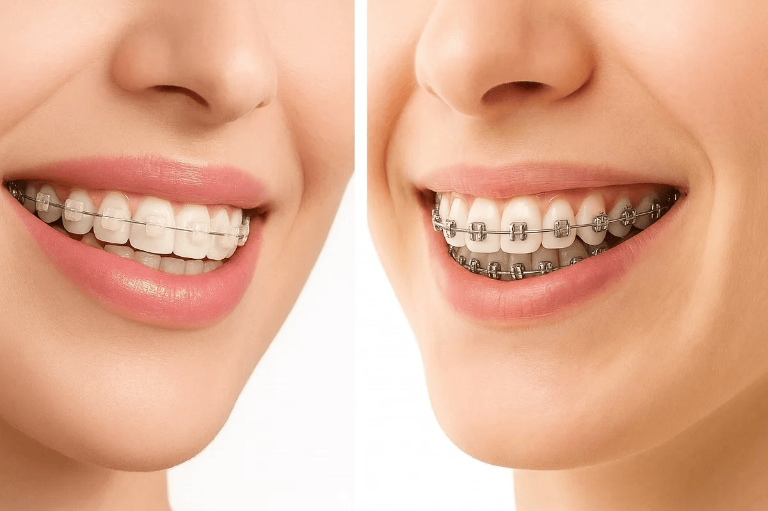
Braces type changes the character of the adjustment. Metal braces have smoother, lower-profile brackets in modern designs, but ceramic brackets can have slightly sharper edges in some configurations. Self-ligating brackets eliminate the elastic ties that hold the wire and often feel smoother in the mouth. For patients who are particularly concerned about initial irritation, discussing bracket options with Dr. Jacob at the consultation is worthwhile.

Attitude and preparation matter more than most patients expect. Patients who understand in advance that days two and three will be uncomfortable and who have soft foods ready go into those days with a plan. Patients who are blindsided by the soreness tend to experience it as more distressing than those who expected it, even when the physical experience is identical.

Compliance with post-bonding care affects how quickly the most uncomfortable phase passes. Patients who manage pain proactively, eat soft foods consistently in the first week, and use wax on irritating brackets tend to have a shorter and less disruptive initial adjustment than patients who try to eat normally from day one or skip pain management.

What Happens After Each Adjustment Appointment

Getting used to braces is not a one-time event. Every four to six weeks, the archwire is adjusted or replaced to continue the planned tooth movement. Each adjustment applies new pressure to teeth that have shifted since the last visit, which triggers a mini-version of the initial adjustment period.

Post-adjustment soreness is typically milder than the first bonding and shorter in duration, usually one to three days. The soft tissue does not need to re-adapt since the brackets are already there. Most patients find that by their third or fourth adjustment visit, the post-visit soreness has reduced to barely noticeable pressure for a day.

Managing it the same way as the first week — soft foods for a day or two, over-the-counter pain relief if needed — makes the regular adjustment appointments much more comfortable over the course of treatment.

What Only a Consultation Can Determine

The adjustment timeline above applies generally across most braces cases, but two things are worth establishing at a consultation before treatment starts.

The first is which braces type fits the case. Metal braces, ceramic braces, and self-ligating systems each have different profiles in the mouth and may have different initial irritation patterns. Dr. Jacob reviews the clinical requirements of each case and discusses aesthetic and comfort preferences at the consultation so the right appliance choice is made before treatment starts rather than after.

The second is whether there are case-specific factors that might extend or modify the adjustment period. A patient who has had significant jaw or muscle sensitivity before treatment may find the initial pressure harder to manage. A patient undergoing a more complex bite correction may have additional appliances alongside braces that require their own adjustment. Those factors are part of the treatment planning conversation at Smile City Orthodontics, not afterthoughts.

How Smile City Orthodontics Supports the Adjustment Period

Dr. Jacob covers what to expect during the adjustment period at every bonding appointment. Patients leave with orthodontic wax, specific soft-food guidance for the first week, and clear instructions for when to call the office versus when to wait out normal soreness.

Smile City Orthodontics offers emergency appointments for appliance issues — a loose bracket, a wire poking the cheek, any hardware problem that cannot wait until the scheduled visit. The practice can be reached by call or text at (214) 663-9144, and same-day appointments are available for urgent care needs.

At each adjustment visit, Dr. Jacob checks soft tissue health, bracket condition, and whether the patient is managing the cleaning routine effectively. The digital scanning technology used at every visit gives a detailed enough picture to catch early plaque accumulation or gum issues before they become a larger problem.

Insurance accepted at Smile City Orthodontics includes Delta Dental, Blue Cross Blue Shield, Aetna, Guardian, MetLife, United Healthcare, G.E.H.A, Careington, and Ameritas. Flexible payment plans with 0% APR financing are available, and the team reviews cost and financing options at the consultation before treatment starts.

Serving Sunnyvale Braces Patients Across the Region

Smile City Orthodontics is located at 180 S Collins Rd, Suite 200, Sunnyvale, TX 75182, just off Highway 80 and approximately 20 minutes from Downtown Dallas. The practice sees braces patients from Sunnyvale and the surrounding communities of Mesquite, Garland, Rowlett, Rockwall, Wylie, and Murphy.

The adjustment timeline described in this guide applies equally to patients from every part of the area. Metal brackets, ceramic brackets, and the adjustment process that follows bonding are the same regardless of where the patient lives. What varies is the specific treatment plan and braces type recommended for each patient’s clinical situation, which is what the consultation addresses.

Common Questions About Getting Used to Braces

Is it normal for braces to hurt so much the first week?

Yes, within a range. Significant soreness in days two and three is entirely normal and expected. The pressure from the archwire is working, and the teeth, bone, and periodontal ligament are all responding to forces they have not experienced before. What is less typical is severe pain that does not respond at all to over-the-counter pain relief, sharp stabbing pain rather than dull pressure, or pain that is getting meaningfully worse past day four or five rather than better. Those situations are worth calling the office about.

Can I go to school or work the day after getting braces?

Yes. Most patients attend school or work normally the day after bonding. The soreness is manageable with over-the-counter pain relief, and the adjustment does not typically impair function to the point of needing to stay home. Having soft foods available during the day helps significantly. The most important practical adjustment for the first few days is avoiding any food that requires hard biting or heavy chewing.

Will braces affect my speech permanently?

No. Speech changes from braces are always temporary and resolve as the tongue and lips adapt to the new appliance profile. Most patients find that any speech change resolves within one to three weeks. The best way to speed the adaptation is simply to talk normally rather than compensating by changing how you form certain sounds, since compensation tends to make the adjustment period longer.

Do ceramic braces feel different from metal during the adjustment?

The adjustment period is similar for both, since the primary source of soreness is archwire pressure rather than the bracket material itself. Some patients find ceramic brackets slightly smoother on the inner lip surface; others notice no difference. The aesthetic appearance is the most meaningful practical difference between the two during daily wear. Dr. Jacob can walk through the specific bracket options available for your case at the consultation.

How do I know if something is wrong versus just normal adjustment soreness?

Normal adjustment soreness is a dull, generalized pressure or ache that is worst around days two and three and improves consistently from there. It affects the teeth broadly rather than one specific point, and it responds to over-the-counter pain relief. Signs that are worth calling the office about include a wire that has slipped and is poking the cheek or the back of the mouth, a bracket that has come loose or feels like it is moving on the tooth, pain that is localized sharply to one tooth rather than broadly distributed, or discomfort that is not improving after day five.

young middle east girl with metal braces smiling happy - How Long Does It Take To Get Used To Braces? A Week-by-Week Breakdown in Sunnyvale TX

Start Braces With a Clear Plan at a Free Consultation

Smile City Orthodontics offers free consultations in Sunnyvale, TX, where Dr. Jacob uses 3D digital scanning and CBCT imaging to build your personalized treatment plan. Same-day starts are available, with flexible 0% APR financing options reviewed at the appointment.

Schedule Your Free Consultation

How to Clean Braces: The Routine That Actually Protects Your Teeth

The right tools matter, but technique and consistency matter more. A step-by-step guide from Dr. Jacob at Smile City Orthodontics, Sunnyvale, TX.

How to clean braces properly starts with understanding that braces do not cause cavities on their own, but they create dozens of new surfaces for plaque and food to collect where a regular toothbrush cannot reach. Patients who clean well throughout treatment finish with healthy enamel. Patients who clean poorly can develop white spots, early decay, or gum problems that outlast the braces themselves. The combination that works is an orthodontic toothbrush used at the right angle, a method for getting floss under the archwire, and a fluoride rinse at the end of the day. Doing all three consistently is more important than which specific products are used.

Most patients who get braces focus on the end result: straight teeth, a confident smile. What keeps that result looking the way it should is what happens twice a day for the next 18 to 24 months while the brackets are on.

At Smile City Orthodontics in Sunnyvale, Dr. Jacob reviews cleaning technique with every patient at the bonding appointment, using digital imaging to show exactly where plaque tends to accumulate around brackets before it becomes a problem.

The guide below covers the same ground: why cleaning is harder with braces, which tools do the job, the technique that reaches every surface, and the daily routine that makes it manageable rather than exhausting.

attractive smiling bearded man with clear braces - How to Clean Braces: The Routine That Actually Protects Your Teeth in Sunnyvale TX

Why Cleaning Braces Is Harder Than It Looks

A tooth without braces has a smooth, curved surface that a toothbrush can sweep relatively efficiently. A tooth with a bracket has four additional edges around the bracket itself, a narrow channel between the bracket and the gumline, spaces under and beside the archwire, and the contact points between brackets where the wire connects. Every one of those spaces traps food and allows plaque to form undisturbed if the brush does not reach it.

The biological risk is real. Plaque that sits against the enamel for extended periods produces acid that demineralizes the tooth surface. Around brackets, this shows up as white spot lesions: chalky, dull patches that appear when the brackets come off and the enamel underneath has been weakened. White spots are permanent. They can be managed cosmetically but they cannot be reversed, which is why prevention during treatment matters far more than any repair afterward.

Gum health is the other side of the same problem. Plaque that builds up along the gumline causes inflammation, swelling, and in chronic cases recession and bone loss. Swollen gums around brackets are not just uncomfortable; they make adjustments harder and, if they persist, can affect the result. Good cleaning is not optional hygiene advice. It is a clinical requirement for the treatment working as planned.

The Two Things That Determine Whether Cleaning Works

Patients who struggle with braces hygiene almost always have a problem in one of two areas, not both.

The first is tools. Using a standard flat toothbrush on braces, without any floss or interproximal brush to reach under the wire, leaves significant areas uncleaned regardless of how long or carefully the brushing happens. The brush geometry simply cannot reach certain surfaces. Buying one or two additional tools solves this.

The second is angle and pressure. Many patients brush past the brackets rather than into them, moving the brush across the front face of the brackets in broad strokes that feel thorough but miss the margins where plaque actually accumulates. The technique section below addresses this specifically.

Both problems are fixable with a short demonstration. Dr. Jacob reviews cleaning technique with every patient at the bonding appointment so that the right habit is established from day one rather than corrected at a six-week check when early plaque signs are already visible.

The Tools Worth Having

You do not need a large collection of products. You need a small set of tools that each cover a surface the others cannot reach.

An orthodontic toothbrush or soft-bristle brush with a compact head. Some patients prefer a brush specifically designed for braces (often with a V-shaped bristle trim that brackets fit into); others do well with any soft-bristle brush with a compact head that can maneuver around individual brackets. Either works. What matters is that the bristles are soft enough not to damage the enamel or gum tissue and that the head is small enough to work around each bracket individually.

An electric toothbrush is a practical upgrade for patients who struggle with manual brushing. The oscillating or sonic motion does some of the work passively, and many electric brush heads are designed to reach the bracket margins well. The same angle and coverage rules apply regardless of whether the brush is manual or powered.

A floss threader, orthodontic floss (Superfloss), or a water flosser. All three serve the same purpose: getting cleaning action under the archwire and between teeth. A floss threader works with regular floss and takes some practice but adds no cost. Superfloss has a stiffened end that threads under the wire more easily and a spongy section that cleans the bracket contact area. A water flosser uses a pulsing stream of water and is the fastest method once the habit is established. Any of the three is far better than skipping interproximal cleaning entirely.

Interdental (proxy) brushes. These small cone- or cylinder-shaped brushes fit under the archwire and clean the space between the wire and the tooth surface, an area a toothbrush typically cannot reach. They are particularly useful for patients with larger spaces between brackets, and for clearing food that gets packed in around the wire after meals.

A fluoride toothpaste and fluoride mouthwash. Fluoride actively strengthens enamel and reduces the risk of white spot formation under and around brackets. Using a fluoride toothpaste for brushing and a fluoride rinse as the last step before bed adds a protective layer that mechanical cleaning alone does not provide. Alcohol-free rinse formulas are preferable since they are gentler on the soft tissue around brackets.

Step-by-Step Brushing Technique

The goal is not speed. It is making sure every surface around every bracket gets covered in the two to three minutes a session takes.

Step 1: Rinse first. A quick water rinse before brushing loosens surface food and makes it easier to see what you are working with.

Step 2: Angle the brush at 45 degrees toward the gumline. Start at the gumline, not at the bracket. Short circular or vibrating strokes at a 45-degree angle to the tooth surface clean the gum margin where plaque most commonly causes early inflammation. Work across the entire arch before moving to the next step.

Step 3: Brush above the bracket. Angle the brush so the bristles press slightly under the top edge of each bracket. The gap between the bracket’s upper edge and the tooth above it accumulates plaque that a flat brushing motion never reaches. Work along the arch tooth by tooth.

Step 4: Brush below the bracket. Same approach at the lower edge of each bracket. Angle the bristles into the space between the bracket’s lower edge and the gumline below it.

Step 5: Brush the front face of the brackets. This is the area most patients only clean. It is also the least important surface for decay prevention, though it matters for keeping the brackets visible and clean. Gentle circular strokes across the front faces of the brackets finishes this pass.

Step 6: Clean the chewing surfaces and the backs of the teeth. Standard brushing technique for these surfaces. The bracket hardware does not extend to the back surfaces or the biting surfaces of the molars, so these areas respond to normal brushing once the front and sides are covered.

Step 7: Spit, do not rinse. Leaving the fluoride toothpaste residue on the teeth for a few minutes before rinsing maximizes the fluoride contact time with the enamel.

How to Floss With Braces

This is the step most patients skip because it is genuinely more difficult with braces than without. The wire blocks the path floss normally takes between teeth, so threading it through takes extra effort. Once the technique is routine, it adds about two to three minutes to the cleaning session.

Floss threader method. Thread a length of regular floss through the loop of the threader. Use the stiffened end of the threader to guide the floss under the archwire between two teeth. Once through, hold both ends of the floss and slide it up and down the side of each adjacent tooth to the gumline, then pull it out and rethread for the next space. This works with any standard floss and is low cost.

Superfloss method. Superfloss has a stiffened tip built in, so no separate threader is needed. The stiffened end threads under the wire; the spongy middle section cleans the bracket contact area; and the regular floss section cleans the normal interproximal surfaces. It is faster than the threader for many patients.

Water flosser method. Fill the reservoir, set the pressure to a comfortable level (low is a good starting point for new users around brackets), and direct the stream between each pair of teeth and along the gumline. It is the fastest method once the habit is established. It does not fully replace mechanical flossing for all patients, but for most braces patients it is an effective and sustainable option when consistent flossing with a threader has failed.

The best method is whichever one actually gets done every day.

A Practical Daily Routine

Follow this simple routine to keep your teeth and braces clean throughout the day.

TimeWhat to doWhy it matters
MorningBrush with orthodontic toothbrush, 2 minutes; use proxy brush under wireClears overnight plaque accumulation before eating
After every meal or snackQuick brush or at minimum a water rinse; use proxy brush if food is trappedFood left against brackets is what allows plaque to form; removing it quickly breaks the cycle
Before bedBrush for 2 minutes (full technique); floss under the wire with threader, Superfloss, or water flosser; fluoride rinse as the last stepNight is when saliva flow is lowest and the teeth are most vulnerable; the fluoride rinse provides protection through overnight hours

Two full cleaning sessions per day is the minimum. After meals and snacks, a quick brush or rinse reduces the window during which food sits against the brackets, which is when most of the acid exposure happens. The bedtime session is the most important and should always be the most thorough.

What Happens When Cleaning Falls Short

Being direct about this is more useful than avoiding it.

White spot lesions are the most common consequence of poor braces hygiene. They appear as chalky white patches on the enamel surface, usually at the margins of where the brackets sat. They are caused by acid demineralization and are visible immediately when the brackets come off. They are permanent, though treatments like microabrasion or fluoride varnish can partially improve their appearance. Prevention during treatment is the only reliable approach.

Cavities around brackets develop for the same reason: acid from plaque sitting against the enamel in areas the brush did not reach. Cavities during orthodontic treatment can complicate the treatment plan and in some cases require the bracket to be removed, the tooth treated, and the bracket rebonded, adding time to the overall timeline.

Gum inflammation and overgrowth around brackets is a sign that plaque along the gumline is not being cleared. Mild gingivitis during braces is common and resolves when cleaning improves. Persistent inflammation that is not addressed can progress to early periodontitis and in some cases cause the gum tissue to grow up and around the bracket, which interferes with tooth movement and requires trimming before treatment can continue.

Foods That Work Against Your Cleaning Routine

This is not a complete food restriction list but rather the specific categories that cause the most cleaning problems rather than just the most mechanical risk to brackets.

Sticky or chewy foods leave residue packed around brackets and under wires that does not come out with a simple rinse. Caramel, gummy candies, dried fruit, and chewy granola bars are the most common culprits and are worth avoiding for the duration of treatment.

Sugary drinks, including juice and sports drinks, coat every surface of the mouth with sugar that feeds the acid-producing bacteria responsible for white spots. Water is the safe choice. If sugary or acidic drinks are consumed, rinsing with water immediately after reduces the exposure window.

Hard foods that require biting with the front teeth risk bracket damage, which creates gaps and rough surfaces where plaque collects. Corn on the cob, whole apples, and crusty bread are the most common examples. Cutting them into smaller pieces before eating keeps the brackets intact.

How Smile City Orthodontics Supports Patients Through Treatment

Every new braces patient at Smile City Orthodontics receives a cleaning demonstration at the bonding appointment, covering the correct brush angle, technique around brackets, and which interproximal tools are recommended for that patient’s specific arch spacing and treatment plan. Dr. Jacob reviews hygiene progress at every adjustment visit and addresses early plaque or gum signs before they become a larger problem.

The practice uses digital scanning technology at each visit, which provides enough resolution to monitor enamel and gum condition alongside tooth movement. If a patient’s hygiene is falling behind, the conversation happens early enough to course-correct rather than at debond when the damage is already done.

Same-day appointments are available for bracket repairs, and the team can walk through cleaning technique in person if a patient has questions between scheduled visits.

Serving Sunnyvale Braces Patients Across the Area

Smile City Orthodontics is located at 180 S Collins Rd, Suite 200, Sunnyvale, TX and sees braces patients from the surrounding communities, including Mesquite, Garland, Rowlett, Rockwall, Wylie, and Murphy. The office is just off Highway 80, approximately 20 minutes from Downtown Dallas and 15 minutes east of Garland.

The cleaning routine described in this guide applies to every braces patient regardless of location. Metal brackets and ceramic brackets work through the same mechanics and present the same cleaning challenges. The specific tools and technique are what change the outcome, and both are things Dr. Jacob and the team go over with every patient at the start of treatment.

Common Questions About Cleaning Braces

How many times a day should I brush with braces?

At minimum twice a day, with a full technique session in the morning and before bed. Ideally, a quick brush or at least a water rinse after every meal and snack reduces how long food sits against the brackets. The bedtime session is the most important and should always be the most thorough, since saliva flow decreases overnight and the teeth have less natural protection during those hours.

Is a water flosser enough, or do I still need regular floss?

For most braces patients, a water flosser used consistently is effective at reducing interproximal plaque and is a sustainable daily habit. It is not identical to mechanical flossing in the force it applies to the tooth surface, but in practice, a water flosser used every day outperforms traditional flossing that gets skipped because it is too time-consuming. The best option is whichever one you will actually do.

What are white spots, and can they be fixed?

White spot lesions are areas of enamel demineralization that appear as chalky, dull patches, usually visible at the bracket margins after the braces come off. They are caused by acid from plaque sitting against the enamel for extended periods. They are permanent changes to the enamel surface. Treatments like microabrasion, fluoride varnish, or resin infiltration can improve their appearance to varying degrees, but they cannot fully restore the enamel to its original condition. Prevention during treatment is the most reliable approach.

Do electric toothbrushes work better than manual for braces?

For many patients, yes, particularly those who find it hard to maintain the correct manual brush angle consistently. The oscillating or sonic motion of an electric brush does some of the mechanical work passively and tends to clean bracket margins more consistently. The same principles apply regardless: the brush still needs to be angled toward the gumline and into the bracket margins rather than just swept across the front face of the brackets.

My gums bleed when I floss around my braces. Should I stop?

Bleeding gums when flossing is usually a sign of early gingivitis, meaning the gum tissue is inflamed from plaque accumulation at the gumline. Stopping flossing because of the bleeding is the opposite of what helps. Consistent daily flossing reduces the inflammation and the bleeding typically decreases within a week or two as the gums become healthier. If the bleeding is heavy, persistent, or accompanied by significant swelling or pain, mention it at the next appointment so Dr. Jacob can assess whether it needs attention.

cheerful happy young woman blonde hair gesturing thumb while pointing clear braces - How to Clean Braces: The Routine That Actually Protects Your Teeth in Sunnyvale TX

Get Your Braces Started with a Free Consultation in Sunnyvale

Smile City Orthodontics offers free orthodontic consultations in Sunnyvale, TX. Dr. Jacob uses 3D digital scanning and CBCT imaging to build a personalized treatment plan, with same-day starts available and flexible 0% APR financing.

Schedule Your Free Consultation

How Does Invisalign Work in Sunnyvale, TX?

How does Invisalign work? The plastic trays are the visible part of Invisalign, but the actual engineering happens before you ever put one in your mouth: a digital simulation maps your teeth’s entire path from where they are now to where they need to end up, then breaks that path into dozens of small, precisely sequenced steps. Each tray you wear is just the physical execution of one step in a plan that was fully mapped out in advance.

If you’re asking how Invisalign works in Sunnyvale, TX: a 3D digital scan of your teeth is used to simulate your entire treatment in advance, then a series of custom clear trays is manufactured to execute that plan one small movement at a time, worn 20 to 22 hours a day and swapped roughly every one to two weeks. It works well for mild to moderate alignment and bite issues. More significant skeletal jaw discrepancies generally still need a combination approach, braces, growth modification, or surgery, rather than aligners alone, regardless of how advanced the software has become.

invisalign clear aligners orthodontics concept young attractive woman - How Does Invisalign Work in Sunnyvale, TX?

The Digital Plan Comes Before the First Tray

Understanding how Invisalign works starts with what happens before any tray is ever made. A digital scanner, rather than a physical impression, captures a precise 3D model of your teeth and bite. That model gets loaded into treatment-planning software, which simulates the entire course of treatment: where every tooth is now, where it needs to end up, and the sequence of small movements that gets it there without damaging the tooth or the surrounding tissue along the way.

This is a meaningfully different approach than simply making incremental trays and seeing how a tooth responds. The whole sequence is planned before manufacturing begins, which is why patients can often preview a simulation of their final result before starting treatment, and why a specific number of trays and an estimated timeline can be given upfront rather than assessed tray by tray.

How the Plan Actually Moves a Tooth

The biological half of how Invisalign works is the same mechanism that makes any orthodontic tooth movement possible. Each tray applies gentle, sustained pressure to specific teeth, which triggers bone remodeling around the tooth root through the periodontal ligament that anchors it in its socket. Bone breaks down on the side facing the pressure and rebuilds on the side facing away, allowing the tooth to migrate through the jaw gradually.

Aligners just deliver that pressure through a removable tray instead of a fixed wire, with attachments (small tooth-colored bumps bonded to specific teeth) sometimes added to give the tray more precise grip for movements like rotation that a smooth tray alone handles less reliably.

What Invisalign Can Treat, and Where It Reaches a Real Limit

Invisalign handles crowding, spacing, and mild to moderate bite issues, including overbite, underbite, and crossbite, well. Digital planning has genuinely expanded what’s achievable with aligners over the past decade, which is a real improvement, not just marketing language.

That said, significant skeletal discrepancies, where the jawbones themselves are misaligned rather than just the teeth, remain a different problem that aligner trays alone don’t solve. A growing child with a skeletal issue may still need growth-modification appliances, and an adult with a significant skeletal discrepancy more realistically needs orthognathic surgery, sometimes combined with aligners or braces to finish aligning the teeth themselves. Digital planning software has gotten better at identifying these cases early, not at making them solvable with trays alone.

Why the Discreet Factor Isn’t Just Cosmetic

Dr. Owais Naeem, a board-certified orthodontist at Potomac River Orthodontics in Manassas, VA, notes that the low profile of clear aligners tends to lower the barrier to starting treatment at all for a meaningful number of adult patients, not just teens, who might otherwise delay care over how visible braces would be in a professional setting. That’s a genuine clinical consideration, since delayed treatment generally means a more complex case by the time it starts.

What Actually Happens Week to Week

Trays are typically worn 20 to 22 hours a day and swapped for the next set in the sequence every one to two weeks, based on how the digital plan sequenced the movements rather than a fixed universal schedule. Progress checkups, usually every 6 to 10 weeks, confirm that the teeth are tracking with the simulation. When they’re not tracking as expected, which does happen, the plan gets adjusted rather than just continuing on the original sequence.

Consistency with wear time matters more than almost any other factor, since a tray only moves teeth while it’s actually in place. A digital plan that assumes 22 hours of daily wear doesn’t produce the same result at 14 hours; the movements simply don’t accumulate on schedule.

Life With Aligners

Aligners come out for eating and drinking anything other than water, which removes the dietary restrictions that come with fixed braces. Brushing and flossing happen with the trays out as well, which most patients find easier than cleaning around brackets and wires.

A mild lisp in the first few days is common as the tongue adjusts to the tray and typically resolves on its own. Aligners need daily cleaning, with a designated cleaning solution or gentle brushing rather than toothpaste, which can scratch the clear plastic and make it more noticeable.

Cost and Timeline

Most Invisalign treatment runs 6 to 18 months and costs between $3,000 and $8,000, depending on case complexity and how many stages the digital plan requires. Insurance frequently covers Invisalign at the same rate as braces when classified as medically necessary, and HSA or FSA funds can typically be applied toward treatment costs.

Frequently Asked Questions

Can I see what my teeth will look like before starting treatment?

Yes. Because the entire treatment is simulated digitally before any trays are manufactured, most patients can preview a projection of their final result during the planning consultation, before committing to treatment.

Does Invisalign really work as well as braces?

For mild to moderate cases, results are generally comparable. For significant skeletal or complex bite cases, braces or a combination approach often provide more direct control, since aligners depend on consistent daily wear in a way fixed appliances don’t.

What happens if my teeth aren’t moving according to the digital plan?

This is checked at routine progress visits. If a tooth isn’t tracking with the simulation, your orthodontist adjusts the plan, sometimes with a refinement scan and a new set of trays, rather than continuing the original sequence unchanged.

Is Invisalign a good option for severe bite problems?

Sometimes, as part of a combination approach, but a significant skeletal discrepancy generally isn’t resolved by aligners alone. An evaluation with imaging is the reliable way to know whether your specific case fits within what aligners can achieve on their own.

smiling woman freckles holding invisalign clear aligners invisible braces - How Does Invisalign Work in Sunnyvale, TX?

See Your Own Digital Treatment Plan

A 3D scan and simulation will show you exactly how your teeth are projected to move, and whether Invisalign can achieve your goals on its own or as part of a broader plan.

Schedule Your Free Consultation
Free consultation for new patients.

Aligners vs Braces in Sunnyvale, TX

Wondering about aligners vs braces in Sunnyvale, TX? At Smile City Orthodontics, you have many options. Getting your teeth straight no longer means you must live with bulky metal braces. You can now pick from comfortable, clear aligners or tried-and-true braces. Both give great results, but one may fit your needs and lifestyle better.

Let’s break down the pros, cons, and key differences. This simple guide will help you feel more confident about your orthodontic care choices.

young arab woman with metal braces breathing closed eyes street - Aligners vs Braces in Sunnyvale, TX

What Are Aligners?

Aligners are clear trays made from safe, soft plastic. Brands like Invisalign lead the way, but new types appear each year. Each tray is made to fit your teeth at each stage of your treatment plan. You wear a set for one to two weeks, then switch to the next tray in the series. Step by step, your teeth move into better alignment.

How Aligners Work

Invisalign aligners are removable, so you can take them out to eat, brush, or floss. This means almost no food restrictions and makes caring for your teeth easy. Your orthodontist will teach you how the trays fit and how to switch them. Many people find aligners more comfortable than braces. The smooth plastic will not scratch your gums or mouth.

Advantages of Aligners

  • Comfort: No wires or metal brackets to poke your cheeks.
  • Clear appearance: Most people cannot see your aligners, so you can smile with confidence.
  • Flexibility: Take out your trays during meals, snacks, and for special occasions.
  • Better oral hygiene: Since Invisalign aligners are removable, brushing and flossing is simple.
  • Aesthetics: Great for teens and adults who want their treatment to stay private.
  • Convenience: Fewer visits for adjustments throughout your treatment process.

Potential Drawbacks of Aligners

  • Patient compliance: You must wear Invisalign aligners 20 to 22 hours each day. Skipping time can slow your results.
  • May not fit every case: Severe crowding, bite problems (like crossbites or deep overbites), and complex teeth alignment may need braces for the best results.
  • Cost: In some cases, Invisalign aligners like Invisalign can cost more than traditional braces.
  • Trays can be lost: If you forget a tray somewhere or break it, you might need a replacement, which takes time and can increase costs.

Who Should Consider Aligners?

Aligners work well for people who want a flexible, nearly invisible solution. If your alignment issues are mild to moderate and you can stick to the wear schedule, aligners can work great. Busy teens and adults in Sunnyvale love Invisalign aligners for their comfort and freedom.

What Are Braces?

Braces use brackets that are fixed to your teeth. Wires connect these brackets and guide tooth movement throughout your treatment timeline. Classic braces are metal, but ceramic options are less visible and may appeal to those who want a more subtle look.

How Braces Work

Unlike Invisalign aligners, you cannot take off braces until your smile transformation is complete. This helps make sure the process stays on track, no matter what. Dr. Yajun Cui, a family orthodontist in Arlington, MA, points out that braces are set and working all the time, so there’s no need to remember wear schedules.

Advantages of Braces

  • Effective for all cases: Braces can solve mild, moderate, and even very tough problems, like severe crowding or big bite changes.
  • No discipline needed: Because you cannot remove them, you never forget to “wear” your treatment.
  • Great results: Braces can fix almost any alignment or bite problem. With modern tools and skilled care, they move teeth with strong control and precise results.
  • Proven track record: Orthodontists have used braces for many years with reliable results.

Drawbacks of Braces

  • Discomfort: Brackets and wires can irritate your cheeks and lips. This is common at the start of treatment or after adjustments.
  • Visible in your smile: Even modern brackets show, no matter which material is used.
  • Food restrictions: You need to stay away from sticky, chewy, or hard foods—gum, popcorn, and some candies can break wires or brackets.
  • Oral hygiene: Brushing and flossing take more time as you work around each bracket and wire.
  • Maintenance and repairs: You may need extra appointments for broken brackets or wires.

Who Should Consider Braces?

Braces are often best for kids and adults with tough cases. If you don’t want to risk losing a tray, prefer lower costs, or have major bite problems, braces are likely the better pick. For children, braces also help parents ensure the treatment is always working.

Your Options Comparison: Aligners vs Braces

When you’re deciding between Invisalign aligners and braces, consider these important factors for your treatment plan:

1. Orthodontic Needs and Complexity

Choosing between braces and aligners often depends on how complex your case is. Some alignment problems are easy to fix. Others need closer control and more adjustments during treatment.

  • Braces treat every case, from simple to complex.
  • Aligners are best for mild or moderate alignment issues.
  • Severe bite problems, like crossbite, may need the special adjustments only braces provide.

2. Comfort, Aesthetics, and Lifestyle

Treatment time varies based on your starting point and goals. Mild alignment issues may move quickly, while complex bite corrections take more time and careful planning.

  • Aligners are comfortable and low-key, perfect for people who don’t want visible treatment.
  • Braces show more but are always working, no need to remember to put them back after eating.

3. Treatment Timeline and Results

Treatment time varies based on your starting point and goals. Mild alignment issues may move quickly, while complex bite corrections take more time and careful planning.

  • The treatment timeline may be shorter for mild cases with Invisalign aligners. More complex issues may take longer, and braces can handle these well.
  • Your orthodontist will create a custom treatment plan for you. The plan is based on your oral health, your goals, and how your teeth look now.

4. Maintenance, Hygiene, and Appointments

Both options need commitment to good oral hygiene and regular office visits. Keeping up with care at home plays a major role in your final results.

  • Both options need regular visits to the orthodontist. These appointments help check progress and make needed adjustments.
  • Braces need more daily work for brushing and flossing, while aligners mean less hassle but more responsibility.
  • You must keep aligner trays in their case when not in use and clean them daily.

5. Food and Drink Restrictions

Diet is another factor to consider. Some treatments limit what you can eat, while others offer more freedom.

  • No food restrictions with aligners, just take them out!
  • Braces mean you must avoid hard, sticky, or chewy foods to avoid damage.

6. Cost, Insurance, and Payment Options

Cost can vary depending on your case and treatment length. It’s important to review pricing and payment plans before starting.

  • Aligners can sometimes cost more, but prices are often close.
  • Many offices offer payment options or financing. Check with your Smile City Orthodontics team for your exact quote and insurance coverage.

7. Reliability and Patient Compliance

Cost can vary depending on your case and treatment length. It’s important to review pricing and payment plans before starting.

  • Aligners require you to follow instructions. Missing even a few hours a day makes a big difference.
  • Braces do not depend on patient discipline, so progress never stalls from forgetfulness.
young blonde woman outdoors holding invisalign clear aligners happy expression - Aligners vs Braces in Sunnyvale, TX

Make Your Decision with Confidence

Aligners and braces both have clear benefits. Aligners offer comfort, appearance, and flexibility. Braces bring proven results and can treat even severe cases.

Your orthodontic journey is personal. At Smile City Orthodontics, we help you compare your options. We answer your questions and guide you to the best choice for your smile, budget, and schedule. Book your consultation today and take the first step toward a healthier, straighter smile!

About the Authors

Dr. George Jacob – Orthodontist in Sunnyale, TX

Dr. Yajun Cui – Orthododontist in Arlington, MA

Frequently Asked Questions

What is the cost difference between braces and aligners?

On average, traditional metal braces can range from $3,000 to $7,000, depending on the complexity of the case and the duration of treatment. On the other hand, clear aligners, like Invisalign, typically fall within the $3,000 to $8,000 range. While the prices can overlap, aligners might sometimes edge out as slightly more expensive due to their discreet nature and the technology involved.

What’s the cheapest way to straighten teeth?

If you’re looking to straighten your teeth without breaking the bank, you might want to consider clear aligners as a budget-friendly option. These nifty little devices are often more affordable than traditional braces and can be done at home, saving you some trips to the orthodontist. Companies like SmileDirectClub or Byte offer these services, where you get a custom set of aligners delivered right to your door.

Which hurts more, aligners or braces?

When it comes to discomfort, both have their moments. Aligners, those clear, removable trays, might feel snug and a bit tight at first, especially when switching to a new set, but they generally cause less irritation since there are no metal brackets or wires involved. Braces, on the other hand, can be a bit more of a nuisance with their metal components, which might poke or rub against your cheeks and lips, especially after adjustments.

Clear Braces vs Metal Braces in Sunnyvale, TX

If you are considering clear braces vs metal braces in Sunnyvale, TX, you may be wondering which is better for you. Both use brackets and a wire to move teeth into a straighter line. Clear braces use ceramic or tooth‑colored parts that blend in with your teeth. Metal braces use shiny steel parts that most people recognize.

This easy‑to‑read guide will show the main differences, pros, and cons so you can make a smart decision for your smile, your lifestyle, and your budget.

beautiful smiling girl showing metal braces teeth orthodontics dental theme - Clear Braces vs Metal Braces in Sunnyvale, TX

What Are Clear Braces?

Clear braces are also known as ceramic braces. They use clear or tooth‑colored brackets that match your natural teeth. This design improves aesthetics because the braces are harder to see, especially from a distance or in photos.

Clear braces are popular with teens and adults in Sunnyvale who care about appearance. They are a nice fit if you work with people, attend many social events, or just want more discretion during treatment. You still get strong teeth straightening, but with a softer look.

How Do Clear Braces Work?

Clear braces work like metal braces. At your appointment, ceramic brackets are placed on your teeth and connected by a thin wire. Small ties hold the wire in place.

The wire applies gentle pressure to improve alignment. With regular adjustments, teeth continue to move as planned. For mild to moderate cases, the effectiveness is similar to metal braces and follows a set treatment plan.

Advantages of Clear Braces

Clear braces offer several key benefits for patients in Sunnyvale, TX.

  • Better Appearance and Aesthetics: Clear or tooth-colored brackets blend with your teeth. This improves appearance and boosts confidence during your braces journey.
  • Strong Teeth Straightening Power: Clear braces offer strong teeth straightening for crowding, gaps, and mild bite issues. With proper care, they deliver quality results similar to metal braces.
  • Smooth Feel and Comfort: Ceramic material feels smooth on lips and cheeks. Comfort improves after early discomfort, which can be managed with wax and simple care.
  • Discreet but Customizable: Clear braces stay low-key but still offer style options. Tooth-colored wires or clear ties enhance aesthetics while using proven technology.

Disadvantages of Clear Braces

Clear braces also come with some cons you should know before you decide.

  • Higher Cost: Clear braces usually have higher pricing than metal braces. Ceramic material and added care can increase treatment costs, so we review cost, budget, and investment details during your consultation.
  • Staining and Discoloration Risks: Ceramic brackets resist discoloration, but elastic ties around the wire can stain. Coffee, tea, soda, curry, and tomato sauces may cause staining without good oral hygiene. Regular cleaning, daily brushing, flossing, and proper care help keep braces bright.
  • Less Durability Than Metal: Ceramic brackets are strong but less durable than metal. They can chip with hard foods or impact. Following diet restrictions and avoiding hard or sticky foods helps protect brackets and the wire.

What Are Metal Braces?

Metal braces are the classic, well‑known style of braces. They use small stainless steel brackets and a metal wire to move teeth. This type of treatment has been used in orthodontics for many years and has a long track record of safe and strong results.

Metal braces are still very common at Smile City Orthodontics in Sunnyvale. They are often chosen because they are sturdy, flexible, and often more budget‑friendly. They can handle a wide range of teeth straightening and bite needs.

How Do Metal Braces Work?

The process for metal braces is simple and time-tested. The orthodontist bonds metal brackets to each tooth and places a metal archwire through them, held in place with small rubber bands or clips. At each visit, the wire and ties are adjusted to keep teeth moving.

These regular adjustments guide teeth into better alignment and help correct many bite problems. Because metal braces offer precise control over tooth movement, they work well for mild, moderate, and complex cases. According to Dr. Danielle Godley, a popular orthodontist in Zionsville, IN, metal braces are a strong pick for kids and teens who need a lasting change.

Advantages of Metal Braces

Metal braces have many clear pros.

  • High Durability: Metal brackets and wires are very strong. This high durability makes metal braces ideal for active kids, teens, and adults, even for complex tooth movement.
  • More Affordable Pricing: Metal braces are often the lowest-cost fixed treatment option. Their material offers strong effectiveness at a lower price, making them a smart choice for patients on a budget. Pricing, payment plans, and insurance are reviewed during your consultation.
  • Works for Simple and Complex Cases: Metal braces treat a wide range of alignment and bite issues. They are often best for complex cases that need precise tooth control.
  • Fun Color Choices: Metal braces allow easy customization with band colors. Many patients enjoy changing colors to match school, sports, or holidays.

Disadvantages of Metal Braces

There are also some cons to think about with metal braces.

  • Higher Visibility: Metal braces are easy to see because the steel brackets and wire stand out. If you prefer low visibility and more discretion, this may be a drawback, though many patients adjust quickly.
  • Early Discomfort: Metal braces can cause early discomfort as brackets and wires rub the lips and cheeks. Wax, salt-water rinses, and time usually help, with comfort improving after the first one to two weeks.
  • Food and Diet Restrictions: You must follow diet restrictions to protect your braces. Avoid hard, sticky, and very chewy foods to prevent broken brackets, bent wires, and delays in your treatment timeline.
  • Extra Cleaning Time: Food can collect around metal brackets and under the wire, so strong oral hygiene is important. Daily brushing, flossing, and proper cleaning help keep teeth and gums healthy.

Clear Braces vs Metal Braces: A Simple Comparison

Here is a clear comparison to help you choose between clear and metal braces in Sunnyvale, TX.

Appearance and Aesthetics

Clear braces blend with your teeth and are less visible, making them a great choice if you care about appearance, work closely with people, or want more discretion. Metal braces are more visible, but they allow fun customization with color bands, which many patients enjoy.

Comfort

Both types can cause some early discomfort, but most patients adjust quickly. Clear braces use smooth ceramic that often feels gentler on the cheeks and lips, while metal braces may rub at first, though wax and time help. In the long run, many patients say overall comfort is similar once they get used to their braces.

Durability

Metal braces offer very high durability, making them ideal for complex tooth movements and active lifestyles. Clear braces are still strong, but ceramic brackets can chip more easily if you bite hard objects or ignore diet restrictions. If you play contact sports or tend to bite hard, metal braces may be the safer choice.

Cost and Investment

Metal braces are usually the lowest cost and most affordable option. Clear braces have higher pricing due to ceramic materials and added care needs. At Smile City Orthodontics, we clearly explain all treatment costs, review insurance benefits, and help you choose a plan that fits your budget.

Cleaning and Oral Hygiene

Clear braces need extra focus on cleaning to prevent staining and discoloration of the ties. Metal braces are a bit easier to keep clean, but still require consistent brushing and flossing. We’ll show you simple tools and fast cleaning tips that fit easily into a busy lifestyle.

Treatment Timeline and Results

For many patients, the treatment timeline is similar for clear and metal braces. Time depends on starting alignment, bite needs, and how well you follow care and visits. Both options can deliver strong results with a proper treatment plan.

Other Options: Invisalign and Clear Aligners

Some patients prefer orthodontic treatment without brackets or wires. For these patients, Invisalign or other clear aligners at Smile City Orthodontics can be an excellent option. Aligners are thin, clear trays that fit snugly over your teeth and can be removed for eating, brushing, and flossing. You change to a new set every one to two weeks, and their nearly invisible design makes treatment comfortable and discreet.

Clear aligners are easy to remove for meals, special events, and daily cleaning, which helps support good oral hygiene. They work best for mild to moderate alignment concerns. During your consultation at Smile City Orthodontics, our orthodontic team will review your smile and explain whether Invisalign is the right fit for your treatment goals.

Your Lifestyle and Braces Choice in Sunnyvale, TX

Your daily life in Sunnyvale should guide your braces choice:

  • If you work with the public or want low‑key aesthetics, clear braces may fit you best.
  • If you play sports, are on a tighter budget, or need big changes in your bite, metal braces may be better.
  • If you want to discuss aligners or Invisalign as another path, our team can set a separate consultation to talk about those options.

No matter what you choose, our goal is to match your braces to your real life, not just your X‑rays.

smiling blonde young woman with clear braces - Clear Braces vs Metal Braces in Sunnyvale, TX

Why Choose Smile City Orthodontics in Sunnyvale, TX?

At Smile City Orthodontics, we focus on clear, simple education and open conversations about the pros and cons of each treatment option. We use modern technology to deliver safe, effective braces and create custom treatment plans that respect your goals, your budget, and your lifestyle.

We walk you through a calm, step‑by‑step comparison of clear braces and metal braces. We explain how each one affects appearance, comfort, pricing, care, and daily convenience. Our team wants you to feel sure about your investment in your smile.

Schedule a Consultation in Sunnyvale, TX

Ready to see which braces are right for you? Schedule a consultation at Smile City Orthodontics in Sunnyvale, TX. During your first appointment, we examine your teeth and bite, explain clear braces vs metal braces in simple terms, review advantages, disadvantages, and key differences, outline your likely treatment timeline, and go over cost, pricing, and any help from insurance.

About the Authors

Dr. George Jacob – Orthodontist in Sunnyvale, TX

Dr. Danielle Godley – Orthodontist in Zionsville, IN

Frequently Asked Questions

Do clear braces stain easily?

The ceramic brackets themselves resist staining, but the elastic ties that hold the wire can discolor over time. Drinking coffee, tea, soda, or eating foods like curry and tomato sauce can increase staining if oral hygiene is not strong. Daily brushing, flossing, and regular cleanings help keep clear braces looking bright.

Are metal braces painful?

Metal braces can cause mild discomfort at the beginning and after adjustments. This usually feels like pressure or soreness rather than pain. Most patients adjust within one to two weeks, and wax or salt-water rinses can help ease irritation during the early stages.

Does insurance cover clear or metal braces?

Many dental insurance plans help cover orthodontic treatment, including both clear braces and metal braces. Coverage amounts vary by plan, and some plans may have age limits or lifetime maximums. At Smile City Orthodontics, we review your insurance benefits and explain costs clearly before treatment begins.

TMJ Treatment in Sunnyvale, TX

Looking for trusted TMJ treatment in Sunnyvale, TX? TMJ or temporomandibular joint disorders often cause jaw pain, clicking sounds, and even headaches, symptoms that many people overlook. Local TMJ treatment focuses on reducing pain and improving jaw joint movement. This guide breaks down what causes TMJ problems and how they’re treated.

woman toothache sick caucasian woman suffering toothache tooth decay - TMJ Treatment in Sunnyvale, TX

What Is a TMJ Disorder?

The temporomandibular joint is the hinge that attaches your jaw to your skull. You use this joint every day, to chew, talk, yawn, and laugh. When it’s not working right, you have a TMJ disorder (TMD).

TMJ symptoms often include:

  • Jaw pain or soreness
  • Jaw clenching
  • Stiffness or feeling “locked”
  • Muscle spasms in the jaw
  • Headaches or pain in the ears or neck
  • Trouble chewing or opening wide

If these symptoms don’t go away, they can cause more muscle tension, discomfort, migraines, or even problems moving your jaw joint at all.

Why Does TMJ Pain Happen?

TMJ pain doesn’t just have one cause. Many things can stress your jaw joint and muscles. Common reasons for TMJ disorders:

Jaw Pain and Soreness

Pain or soreness in the jaw, around the cheek or ear, is common. Chewing, talking, or yawning can make it worse. Pain may also spread to your neck or shoulders. Gentle exercises, a mouthguard, or muscle relaxants can be part of your treatment plan.

Clicking, Popping, or Jaw Noises

If your jaw makes clicking or popping sounds when you chew or talk, it may mean your joint is not moving correctly. This may not always hurt, but frequent or painful noises can signal a bigger problem with jaw development or facial structure, or underlying arthritis.

Headaches and Ear Pain

TMJ disorders can cause headaches and ear discomfort. Muscle tension may trigger pain or make your ears feel full or ring. Stress relief and relaxation are common treatment options for this.

Jaw Locking or Limited Movement

Sometimes your jaw may “lock” open or closed, or moving it feels hard. Tight muscles, bite misalignment, or joint issues can cause this. Proper treatment and gentle exercises can improve alignment and jaw function.

Signs You May Have a TMJ Disorder

Watch for these TMJ symptoms:

  • Pain: Soreness in your jaw, around your cheek or ear, and sometimes in your neck and shoulders
  • Clicking or popping: Notice the sound or feeling when you chew or talk
  • Locking: Jaw gets stuck open or closed, or it’s hard to move
  • Muscle spasms: Tense or sore jaw muscles, sometimes worse in the morning
  • Headaches: Especially around your temples, forehead, or behind your ears
  • Trouble chewing: Stiffness or bites that feel “off” can make meals tough
  • Ear pain or fullness: Pressure or ringing that starts when your jaw feels bad

Early diagnosis and care from a TMJ specialist can prevent worse pain and give you faster relief.

How Is TMJ Disorder Diagnosed?

A careful examination is key to long-term TMJ relief. At Smile City Orthodontics, our team creates a custom treatment plan based on your symptoms and daily habits. Here’s what happens during your consultation:

1. Physical Exam

Your doctor will gently feel your jaw, neck, and shoulders. They look for sore spots, clicking, or swelling. You may be asked to open and close your jaw and move it side to side. This helps them check jaw function and muscle tension.

2. Bite and Jaw Alignment Check

Next, your orthodontist studies your bite. Misaligned teeth or jaw can cause TMJ pain. Spotting things like overbites, underbites, or worn teeth (from grinding) helps guide the right plan. According to Dr. Leonardo Koerich, a well-known orthodontist in Charlotte, NC, fixing these bite problems can often lower jaw strain and prevent your TMJ symptoms from getting worse in the future.

3. Imaging and Scans

If needed, the team may use X-rays or 3D dental scans to see the temporomandibular joint. Images show if the joint is out of place, swollen, or damaged. Sometimes, other tests like MRI are useful for soft tissues or disc issues.

This full diagnosis helps us choose the best TMJ treatment for your unique case.

TMJ Treatment Options at Smile City Orthodontics

We believe in gentle, personalized TMJ care. Most patients feel better with non-surgical choices, but advanced or surgical therapies are available if pain continues.

1. Non-Surgical Treatments

  • Night guards and mouthguards: These custom devices keep your jaw in a relaxed spot and stop teeth grinding at night.
  • Physical therapy and jaw stretches: Gentle exercises, heat therapy, and massage can ease tight muscles.
  • Medications: Over-the-counter pain relief, anti-inflammatories, or muscle relaxants for strong pain.
  • Stress management techniques: Relaxation, deep breathing, and lifestyle changes to cut down stress.
  • Ice and heat therapy: Heat relaxes sore muscles; cold reduces swelling after a tough day.

2. Advanced Therapies

  • Botox injections: Small doses of botox relax tight jaw muscles and ease painful muscle spasms.
  • Trigger-point injections: Medicine is injected into tense areas for fast pain relief.
  • Orthodontic treatments: Braces or aligners to fix bite misalignment and improve jaw alignment.
  • Laser therapy: Light treatments increase blood flow, lower swelling, and speed healing.
  • Custom mouthguards: Designed for you, these reduce grinding and support healthy jaw movement.

3. Surgery (For Severe Cases)

Most TMJ pain gets better without surgery. Surgery is only considered if you have severe damage, joint locking, or if all other care has failed.

  • Arthroscopy: Small camera and tools for fast repair with little downtime.
  • Arthrocentesis: Washing the joint to remove swelling and waste.
  • Open surgery: Used rarely, only for joint repairs that cannot be done any other way.

Your specialist will only suggest surgery after other TMJ therapies don’t relieve your pain.

TMJ Treatment Costs and Insurance Coverage

The cost of TMJ treatment can vary based on the type of care you need, how long treatment lasts, and what your insurance covers. Custom night guards or splints usually range from $500 to $1,000. Botox or other muscle injections often cost between $300 and $600 per session. Braces or aligners used to correct the bite may range from $3,500 to $8,000. Many dental and health insurance plans help pay for TMJ exams and certain therapies. At Smile City Orthodontics, we also offer flexible payment plans and work with you to make sure you get the relief you need without unexpected costs.

asian thai worry face shape - TMJ Treatment in Sunnyvale, TX

How to Choose the Right TMJ Specialist in Sunnyvale, TX

Pick a provider who gives:

  • A full TMJ exam, including X-rays and bite evaluation
  • Custom therapy plans based on your symptoms and lifestyle
  • Gentle, modern technology
  • Support with lifestyle changes, like diet and sleep tips

At Smile City Orthodontics, our team works with you, not just for quick fixes but with long-term jaw health in mind. We help you understand your TMJ disorder and how best to live pain-free.

Book Your TMJ Consultation in Sunnyvale

If jaw pain, headaches, or clicking are affecting your daily life, now is the perfect time to take control of your health. At Smile City Orthodontics in Sunnyvale, TX, our team is ready to guide you toward real, lasting TMJ relief with a plan tailored to your symptoms, habits, and lifestyle. Whether you’re struggling with grinding, clenching, bite issues, or stubborn muscle tension, we’re here to help you regain comfort and confidence.

Schedule your TMJ consultation today and start your path to easier chewing, smoother jaw movement, and a life free from daily discomfort. Your relief begins with one simple step.

About the Authors

Dr. George Jacob – Orthodontist in Sunnyvale, TX

Dr. Leonardo Koerich – Orthodontist in Charlotte, NC

Frequently Asked Questions

What foods should I avoid if I have TMJ pain?

If you’re dealing with TMJ pain, try to limit hard, chewy, or sticky foods such as nuts, gum, tough meats, and chewy candies since they can stress the jaw. Opt for softer foods like yogurt, mashed potatoes, soups, and smoothies to allow your jaw to rest and recover.

Can TMJ disorder go away on its own?

Sometimes mild TMJ symptoms improve without treatment, especially with rest and stress reduction. However, if your jaw pain, clicking, or stiffness continues, it’s best to see a TMJ specialist. Early care can prevent the issue from progressing and help restore normal jaw function.

Can TMJ disorders cause headaches or ear pain?

Yes. TMJ disorders can lead to headaches, ear discomfort, or a feeling of fullness in the ears. Because the jaw joint is located near the ear and shares surrounding muscles, tension and inflammation can spread to these areas. Proper TMJ treatment can ease muscle strain and reduce these symptoms.

How to Get Braces Glue Off Teeth in Sunnyvale, TX

Want to know how to get braces glue off teeth in Sunnyvale, TX? Orthodontists use safe polishing tools to remove the glue without harming your enamel. If any glue is still visible, don’t scrape it off; have a follow-up appointment instead. Keep reading this guide to explore why the adhesive is difficult to remove, the risks of DIY methods, and how orthodontists handle the removal.

girl pointing her metal braces light blue background - How to Get Braces Glue Off Teeth in Sunnyvale, TX

What Is Braces Glue, and How Do Orthodontists Remove It?

Braces glue is a strong adhesive that bonds your braces to your teeth. This material is designed to last through your orthodontic care, standing up to brushing, flossing, and eating. But it isn’t meant to stay on your teeth forever. After your braces come off, the remaining adhesive needs to be removed carefully to avoid any harm to your enamel.

At Smile City Orthodontics, orthodontists use special tools for braces glue removal. These tools include polishing instruments and adhesive removers. These techniques allow orthodontists to gently and effectively remove glue, ensuring your teeth are smooth and free of residue. This process protects your enamel and keeps your teeth healthy.

Why Is Braces Glue Difficult to Remove?

Braces glue is designed to last for a long time, even years. While this durability is great for keeping braces secure during treatment, it makes removing the adhesive tricky without the proper tools. As Dr. David Carpinello, a respected orthodontist in Newtown Square, PA, points out, expert care ensures the glue is cleaned off smoothly without harming the enamel underneath.

If glue isn’t removed correctly, several problems could occur:

  • Sticky Residue: Leftover glue can trap plaque and bacteria. This increases the risk of cavities or tooth decay.
  • Rough Spots: Uneven glue patches can irritate your gums and may make teeth feel sensitive or sore.
  • Enamel Damage: Scraping glue off with sharp tools or using harsh substances may cause permanent enamel damage. Your enamel, unlike other parts of your body, cannot grow back after being scratched or eroded.

Orthodontists use professional tools and techniques to safely remove glue. This ensures the adhesive is cleaned off without harming your tooth enamel.

Why DIY Removal Can Hurt Your Teeth

Some people try to remove braces glue on their own. While this might seem like a simple task, it’s not safe. Orthodontic glue removal requires professional care. DIY methods often cause more harm than good and lead to permanent damage. Here are some common risks of trying to remove glue yourself:

1. Enamel Damage

Many DIY methods involve sharp objects like knives, scissors, or needles. These tools can scratch the enamel on your teeth, leaving permanent marks. Since damaged enamel cannot grow back, your teeth will become weaker and more vulnerable to decay.

2. Adhesive Residue

Home remedies, like scrubbing with baking soda paste, often fail to completely remove all adhesive residue. Leftover patches can make the tooth surface rough, trapping plaque and food particles. Over time, this buildup increases your risk of gum irritation and cavities.

3. Tooth Sensitivity

DIY braces glue removal often involves harsh or abrasive methods. These can expose sensitive areas of your teeth, making them more uncomfortable when eating or drinking hot or cold foods. Chemicals or aggressive scrubbing can also irritate your gums.

Mistakes to Avoid When Removing Braces Glue

To keep your smile safe, avoid these common errors when removing braces glue:

  • Don’t Use Sharp Tools: Scraping glue with sharp objects like scissors or needles can scratch and weaken your enamel.
  • Avoid Harsh Chemicals: Acids such as lemon juice or vinegar can erode your enamel, causing permanent damage.
  • Don’t Whiten Too Soon: Whitening toothpaste and strips can irritate your teeth immediately after braces are removed.

How to Care for Your Teeth After Glue Removal

Once your orthodontist has removed the braces glue, it’s important to care for your teeth properly. As Dr. Shalise Holt, a braces specialist orthodontist in Twinsburg, OH, notes, gentle care right after glue removal helps your enamel stay strong and lowers the chance of sensitivity

Good dental hygiene and mindful habits can help maintain smooth, healthy enamel. Here are some tips:

1. Brush and Floss Daily

Brush your teeth twice a day with a soft toothbrush and fluoride toothpaste. This routine will keep your enamel strong and your teeth clean. Floss every day to remove any food particles or plaque stuck between your teeth. If flossing is tricky, a water flosser can help you.

2. Rinse with Saltwater

If your gums feel tender after glue removal, rinse them with saltwater to reduce discomfort. Mix half a teaspoon of salt into a cup of warm water and swish it around for 30 seconds. Repeat this two or three times a day.

3. Use Fluoride Mouthwash

Fluoride mouthwash can strengthen your enamel while protecting your teeth from plaque. Rinse with fluoride mouthwash every evening to help prevent future damage.

4. Stick to Soft Foods

After the glue removal process, eat soft foods like yogurt, mashed potatoes, or scrambled eggs. Avoid hard or sticky foods like nuts, caramel, or gum, which could damage newly polished teeth.

Long-Term Dental Tips for Healthy Teeth

A good dental hygiene routine will keep your teeth healthy long after your braces come off. Remember these simple tips to protect your smile:

  • Brush your teeth twice daily with fluoride toothpaste.
  • Floss daily to keep your gums and teeth clean.
  • Schedule regular dental cleanings every six months.
  • Eat tooth-friendly foods like leafy greens, cheese, and yogurt, while limiting sugary snacks and sodas.

What Happens During Braces Glue Removal?

At Smile City Orthodontics in Sunnyvale, TX, the braces glue removal process is quick, easy, and pain-free. Here’s what to expect:

Before Your Visit

Brush your teeth thoroughly before your appointment to remove any plaque or food debris. Avoid eating sticky or hard foods on the day of your visit. If you have questions about the removal process or aftercare, write them down to discuss with your orthodontist.

During the Appointment

Your orthodontist will use professional polishing tools to gently clean your tooth surface. Glue removal usually takes 30 to 45 minutes and is comfortable for most patients.

After the Appointment

Once the process is complete, follow the care tips your orthodontist provides. Stick to soft foods for a few days, avoid biting hard objects like ice, and continue practicing good oral hygiene.

young man with metal braces showing thumb up on blue background - How to Get Braces Glue Off Teeth in Sunnyvale, TX

Why Choose Smile City Orthodontics in Sunnyvale, TX?

At Smile City Orthodontics, we ensure your treatment process of braces glue removal process is simple, safe, and stress-free. We use advanced tools and gentle polishing techniques to clean off adhesive without harming your enamel. Whether you received your braces treatment here or transferred to us from another practice, we are committed to keeping your smile healthy.

Schedule Your Appointment Today!

If you’re ready to finish your braces journey with smooth, healthy teeth, our team at Smile City Orthodontics is here to help. Professional glue removal protects your enamel, prevents sensitivity, and ensures your smile looks its best. Schedule your consultation today and enjoy the confident, polished smile you’ve been waiting for.

About The Author

Dr. Jeryn Jacob – Orthodontist in Sunnyvale, TX

Dr. David Carpinello – Orthodontist in Drexel Hill, Newtown Square, and Edgmont, PA

Frequently Asked Questions

Will my teeth feel sensitive after the glue is removed?

Some people may feel slight sensitivity after the glue is taken off, but this feeling is usually temporary. It often goes away in a few days. Using fluoride toothpaste and avoiding very hot or very cold foods can help while the sensitivity settles.

Can braces glue stain your teeth?

The glue itself does not normally cause staining. Any marks that appear are usually caused by plaque that built up around the brackets during treatment. Good brushing and regular dental cleanings can help prevent these spots. After the glue is removed and your teeth are polished, they should look smooth and even in color.

How long does dental glue last on teeth?

The glue used for braces is designed to stay in place for your entire braces treatment. It is strong enough to hold the brackets, but it is not permanent. When your braces are removed, the dentist will also remove the glue during the same appointment.

How to Floss with Braces in Sunnyvale, TX

Having trouble figuring out how to floss with braces in Sunnyvale, TX? You’re not alone! Managing your oral hygiene with brackets and wires can be tricky at the start. But with the right flossing tools and techniques, it gets much easier. Keep reading to learn how to make flossing quick, easy, and stress-free.

closeup image smiling teenager curly red hair metal braces - How to Floss with Braces in Sunnyvale, TX

Why Flossing with Braces Is So Important

Braces help straighten your teeth, but they can make cleaning harder. Wires and brackets often trap food and plaque in small spaces. If not cleaned well, this buildup can turn into tartar and cause tooth decay or gum disease. Flossing is important because brushing alone can’t reach every spot. A steady flossing routine keeps your teeth clean and helps your braces work better.

The Best Tools to Improve Your Flossing Routine

The right tools can simplify the process of flossing with braces. Here are the most popular and effective options:

Floss Threaders

Floss threaders work like sewing needles to help you guide dental floss under your wires. These are particularly helpful for reaching between your teeth without damaging your braces. They are small, easy to use, and can save you time while cleaning. With a bit of practice, you’ll be able to floss your whole mouth with less effort.

Water Flossers and Oral Irrigators

Water flossers shoot water between your teeth and around brackets and wires. They’re great for people who struggle with string floss or have sensitive gums. The gentle water stream helps remove food and plaque without irritation.

Superfloss

Superfloss is pre-cut floss that combines stiff ends to help with threading and spongy sections for cleaning under wires. This tool is excellent for reaching tricky spots around brackets. It’s soft, easy to handle, and made for people with braces.

Interdental Brushes (Proxy Brushes)

An interdental or proxy brush is a small toothbrush designed to clean between teeth. This tool removes plaque buildup in spaces that floss may not reach easily. These brushes come in many sizes and fit comfortably between your brackets.

Floss Picks

Floss picks have a handle and a piece of pre-threaded floss, making it simple to clean tight areas between your teeth. Many people find these more comfortable and quicker to use compared to string floss. They’re easy to carry and perfect for cleaning on the go.

Where to Find These Flossing Tools

You can pick up flossing tools like water flossers, floss threaders, proxy brushes, or floss picks at local stores, online, or at your orthodontic clinic. Smile City Orthodontics in Sunnyvale, TX, also offers starter kits with everything you need to start good oral care at home.

Flossing with Braces: A Simple Step-by-Step Guide

Follow this guide for an effective flossing routine:

Step 1: Get Your Floss Ready

Take about 18 inches of dental floss. Use a floss threader to guide it under the wire before starting. According to Dr. Jared Gianquinto, a professional orthodontist in Bakersfield and Tehachapi, CA, using the right length of floss ensures you have enough to reach every tooth without reusing dirty sections.

Step 2: Floss Around Each Toothreusing

Wrap the floss around one tooth in a “C” shape. Gently slide the floss up and down along the gumline to clear out debris and plaque. Avoid pulling too hard to prevent gum irritation or damage to your brackets.

Step 3: Use a Water Flosser for Extra Cleaning

Complement your flossing routine by using a water flosser to target tricky areas like your back teeth, wires, or brackets. Adjust the pressure settings if your gums are sensitive.

Step 4: Brush Thoroughly

After flossing, brush your teeth using a soft-bristled toothbrush and fluoride toothpaste. Pay special attention to the spaces around wires and brackets. For added protection, rinse with fluoride mouthwash to fight against tooth decay and plaque buildup.

Adjusting Flossing Methods for Different Types of Braces

Each type of braces requires slightly different flossing techniques:

  • Metal Braces: Spend extra time threading dental floss through the wires.
  • Clear Braces: Be gentle to avoid breaking the delicate brackets.
  • Lingual Braces: Since these braces are placed behind the teeth, use tools like a water flosser or proxy brush to reach the back surfaces.
  • Self-Ligating Braces: These tend to have fewer parts, but your flossing routine should still be thorough.

How to Overcome Flossing Challenges

Flossing may feel awkward with braces, but practice and the right tools will help. Here are solutions to common challenges:

  • Sensitive or Bleeding Gums: Flossing can irritate gums, especially if you’re new to it. Rinse with warm saltwater to ease discomfort. Gentle flossing over time also strengthens your gums.
  • Hard-to-Reach Areas: Use tools like a proxy brush, interdental brushes, or a water flosser to clean narrow spaces and back teeth effectively.
  • Frustration with String Floss: If threading string floss feels too slow, try pre-threaded floss picks. These tools speed up the process and make it less frustrating.

Post-Braces Oral Hygiene Routine

After your braces are off, continuing good dental hygiene habits is important to preserve your new smile:

  • Retainer Cleaning: Rinse and brush your retainer regularly to prevent plaque accumulation.
  • Daily Flossing: Keep flossing every day to maintain healthy gums and teeth.
  • Brushing Techniques: Brush twice a day for at least two minutes using fluoride toothpaste.
young man with metal braces toothbrush dentist tool - How to Floss with Braces in Sunnyvale, TX

Why Smile City Orthodontics Recommends Proper Flossing

At Smile City Orthodontics, we believe that proper oral hygiene practices are key to achieving the smile you’ve always wanted. Our team provides:

  • Personalized Flossing Tips: Learn how to floss effectively based on your specific braces type.
  • Starter Kits: Receive tools like floss threaders, water flossers, and proxy brushes to simplify your daily routine.
  • Expert Help: Our team can guide you with gum care, plaque control, and ways to prevent tooth decay.

Start Your Flossing Routine Now

Flossing with braces doesn’t have to be a challenge. The right flossing tools and methods can simplify your routine and make a big difference in your dental health. If you’re struggling to keep your teeth clean, Smile City Orthodontics is here to help. Contact our office in Sunnyvale, TX, for personalized advice and the tools you need to keep your smile healthy.

About The Authors

Dr. Jeryn Jacob – Orthodontist in Sunnyvale, TX

Dr. Jared Gianquinto – Orthodontist in Bakersfield and Tehachapi, CA

Frequently Asked Questions

Why is it so hard to floss with braces?

Flossing with braces can feel tough because the wires and brackets get in the way. It’s harder to guide the floss between your teeth, and you have to be extra careful not to snag it or pull on the braces. It can take more time and patience, especially when reaching the back teeth. But with practice and tools like floss threaders or small brushes, it gets easier. A little extra effort now will help keep your smile healthy and bright.

Is it OK to not floss with braces?

Skipping flossing with braces might seem tempting, but it’s not a good idea. Braces can trap food and plaque, which can lead to cavities, stains, or gum problems. Flossing helps keep your mouth clean and healthy during treatment. Even if it feels like a hassle at first, it gets easier with time and the right tools.

How can I tell if I’m flossing correctly?

You’re likely flossing right if you feel gentle resistance as the floss slides between your teeth. Wrap the floss in a C-shape around each tooth and move it up and down, not side to side. A little squeaky sound means your teeth are getting clean. Don’t skip the back teeth, and be gentle to avoid bleeding gums. With regular practice, flossing will feel quicker and easier.